🚀 Performance Testing
Performance Testing in E2E Test Automation allows you to evaluate how your APIs perform under varying levels of load. Whether it’s handling a fixed number of requests or ramping up the load gradually, E2E Test Automation simulates real-world traffic and measures how the API behaves under stress. This ensures that your APIs can handle high traffic volumes, respond within acceptable time limits, and maintain their reliability.
Performance testing helps you:
- Identify performance bottlenecks
- Test scalability under load
- Verify response times and throughput
The process of performance testing in E2E Test Automation involves creating a test suite, selecting APIs for performance testing, generating performance test cases, and analyzing the results to detect any performance degradation under different load conditions.
🛠️ Setting Up Performance Testing
Step 1: Create a Test Suite
Steps:
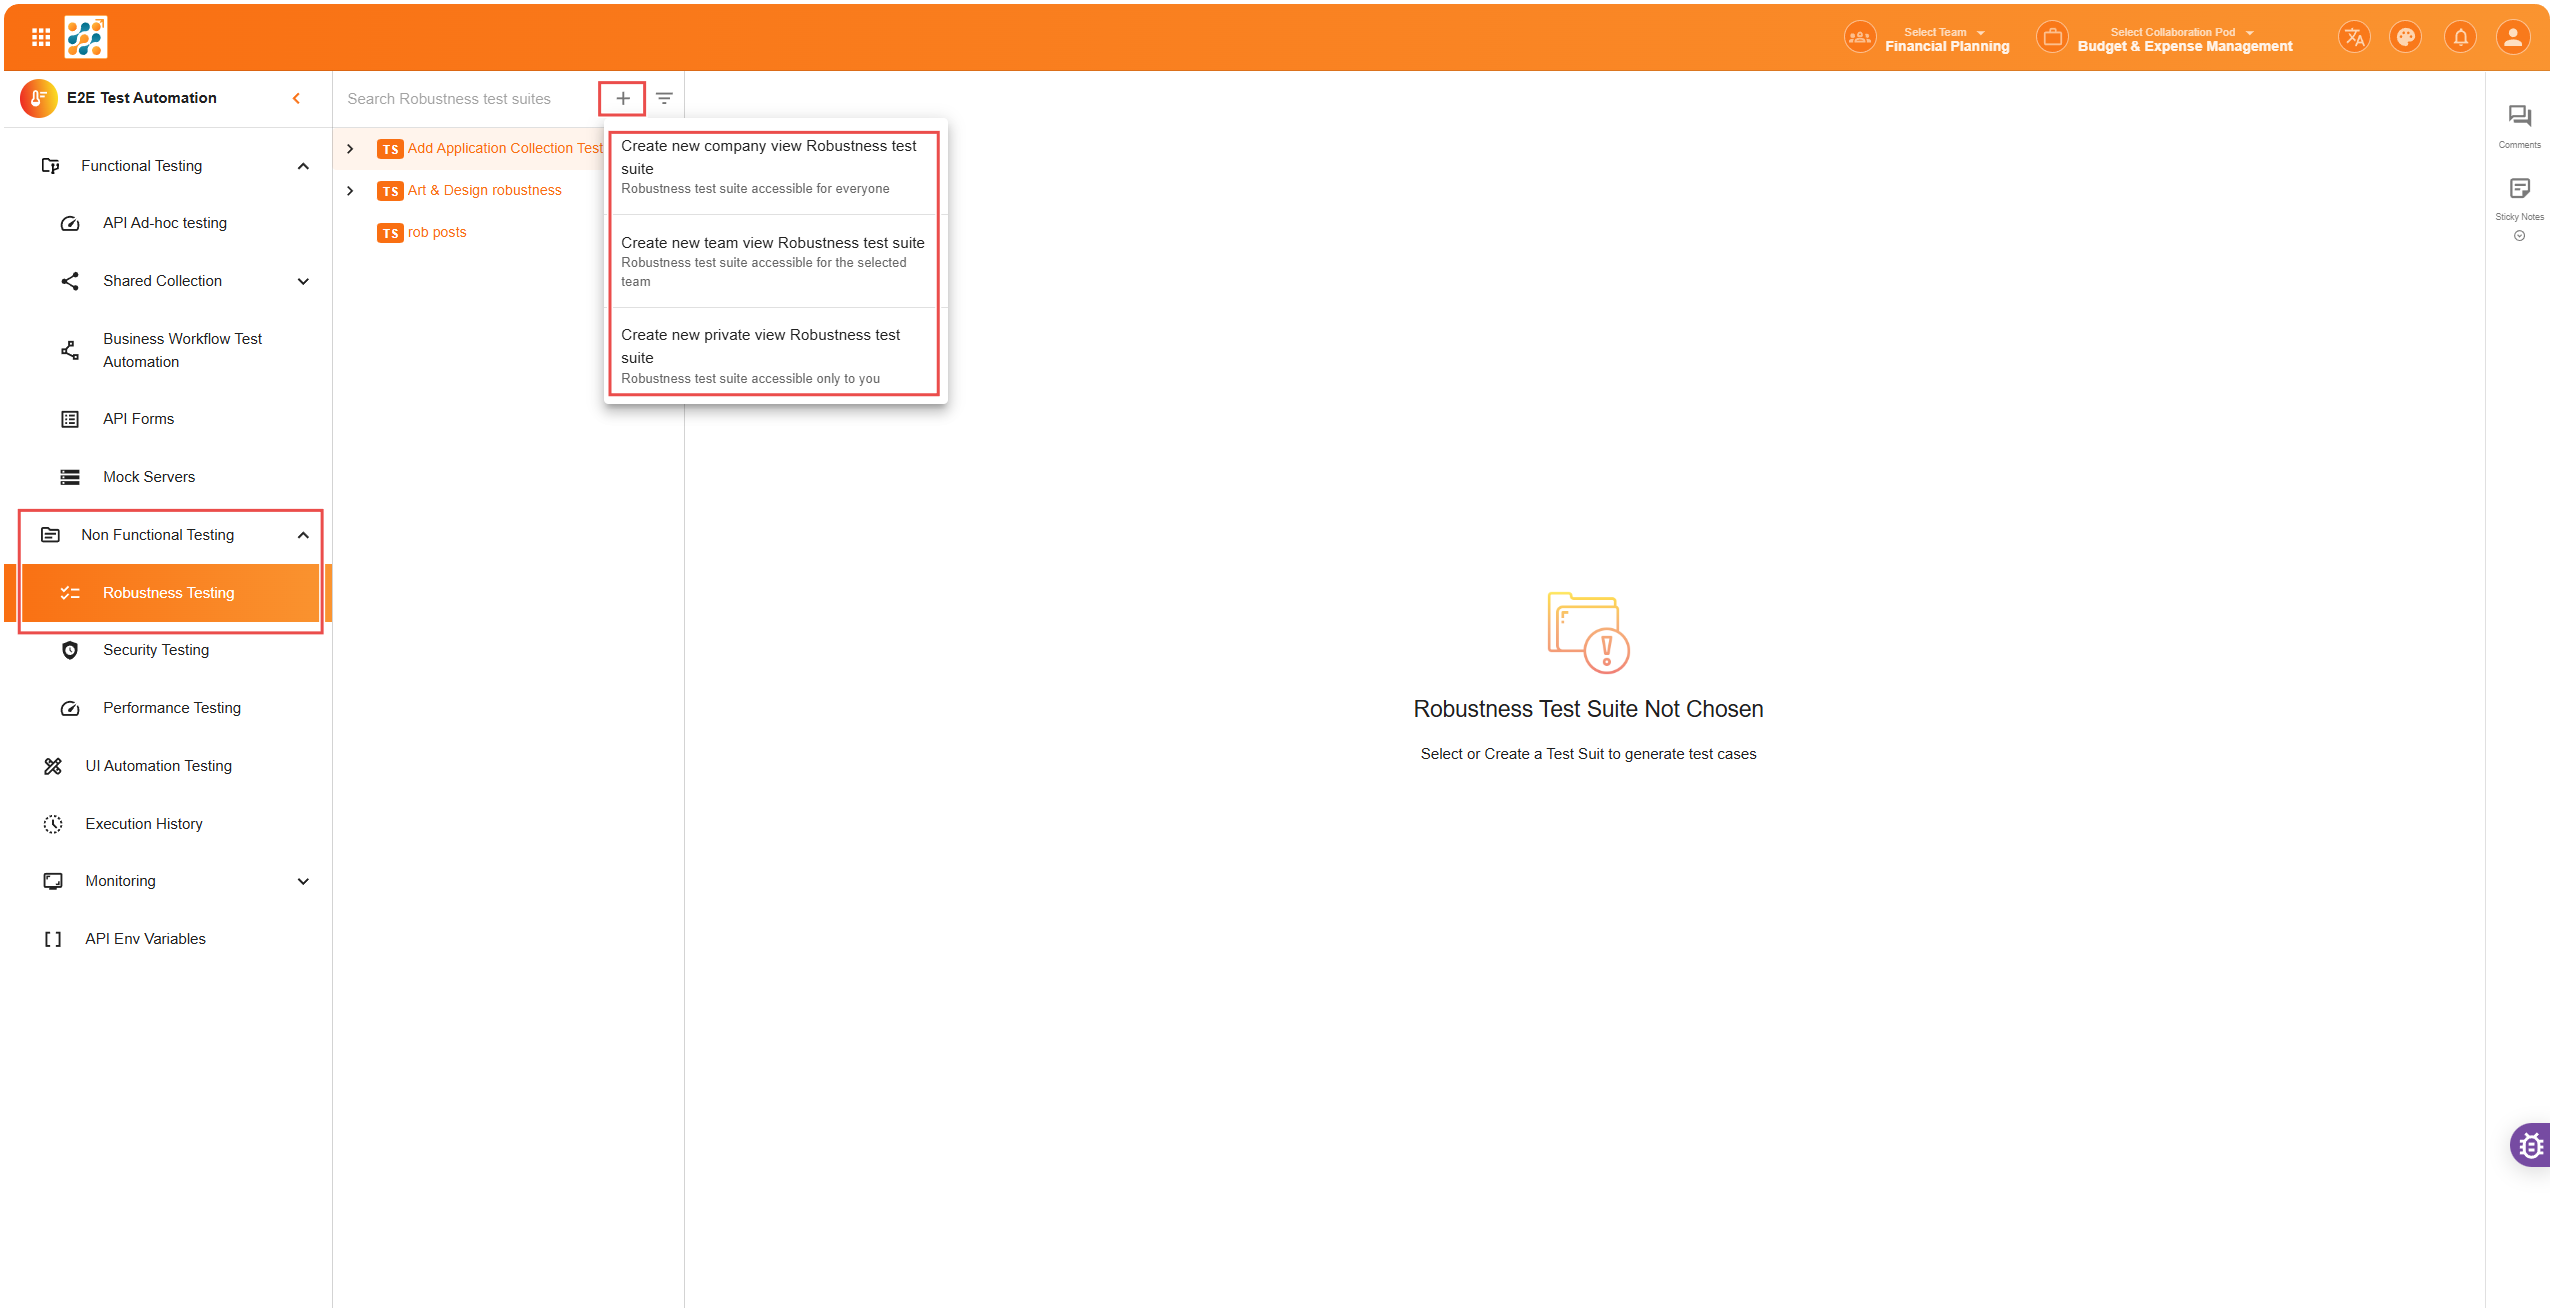
- Navigate to the Test Suite Section – In E2E Test Automation, go to Non Functional Testing and locate the Performance Testing module
- Click the ”+” Icon – Click the ”+” icon at the top of the screen to create a new test suite
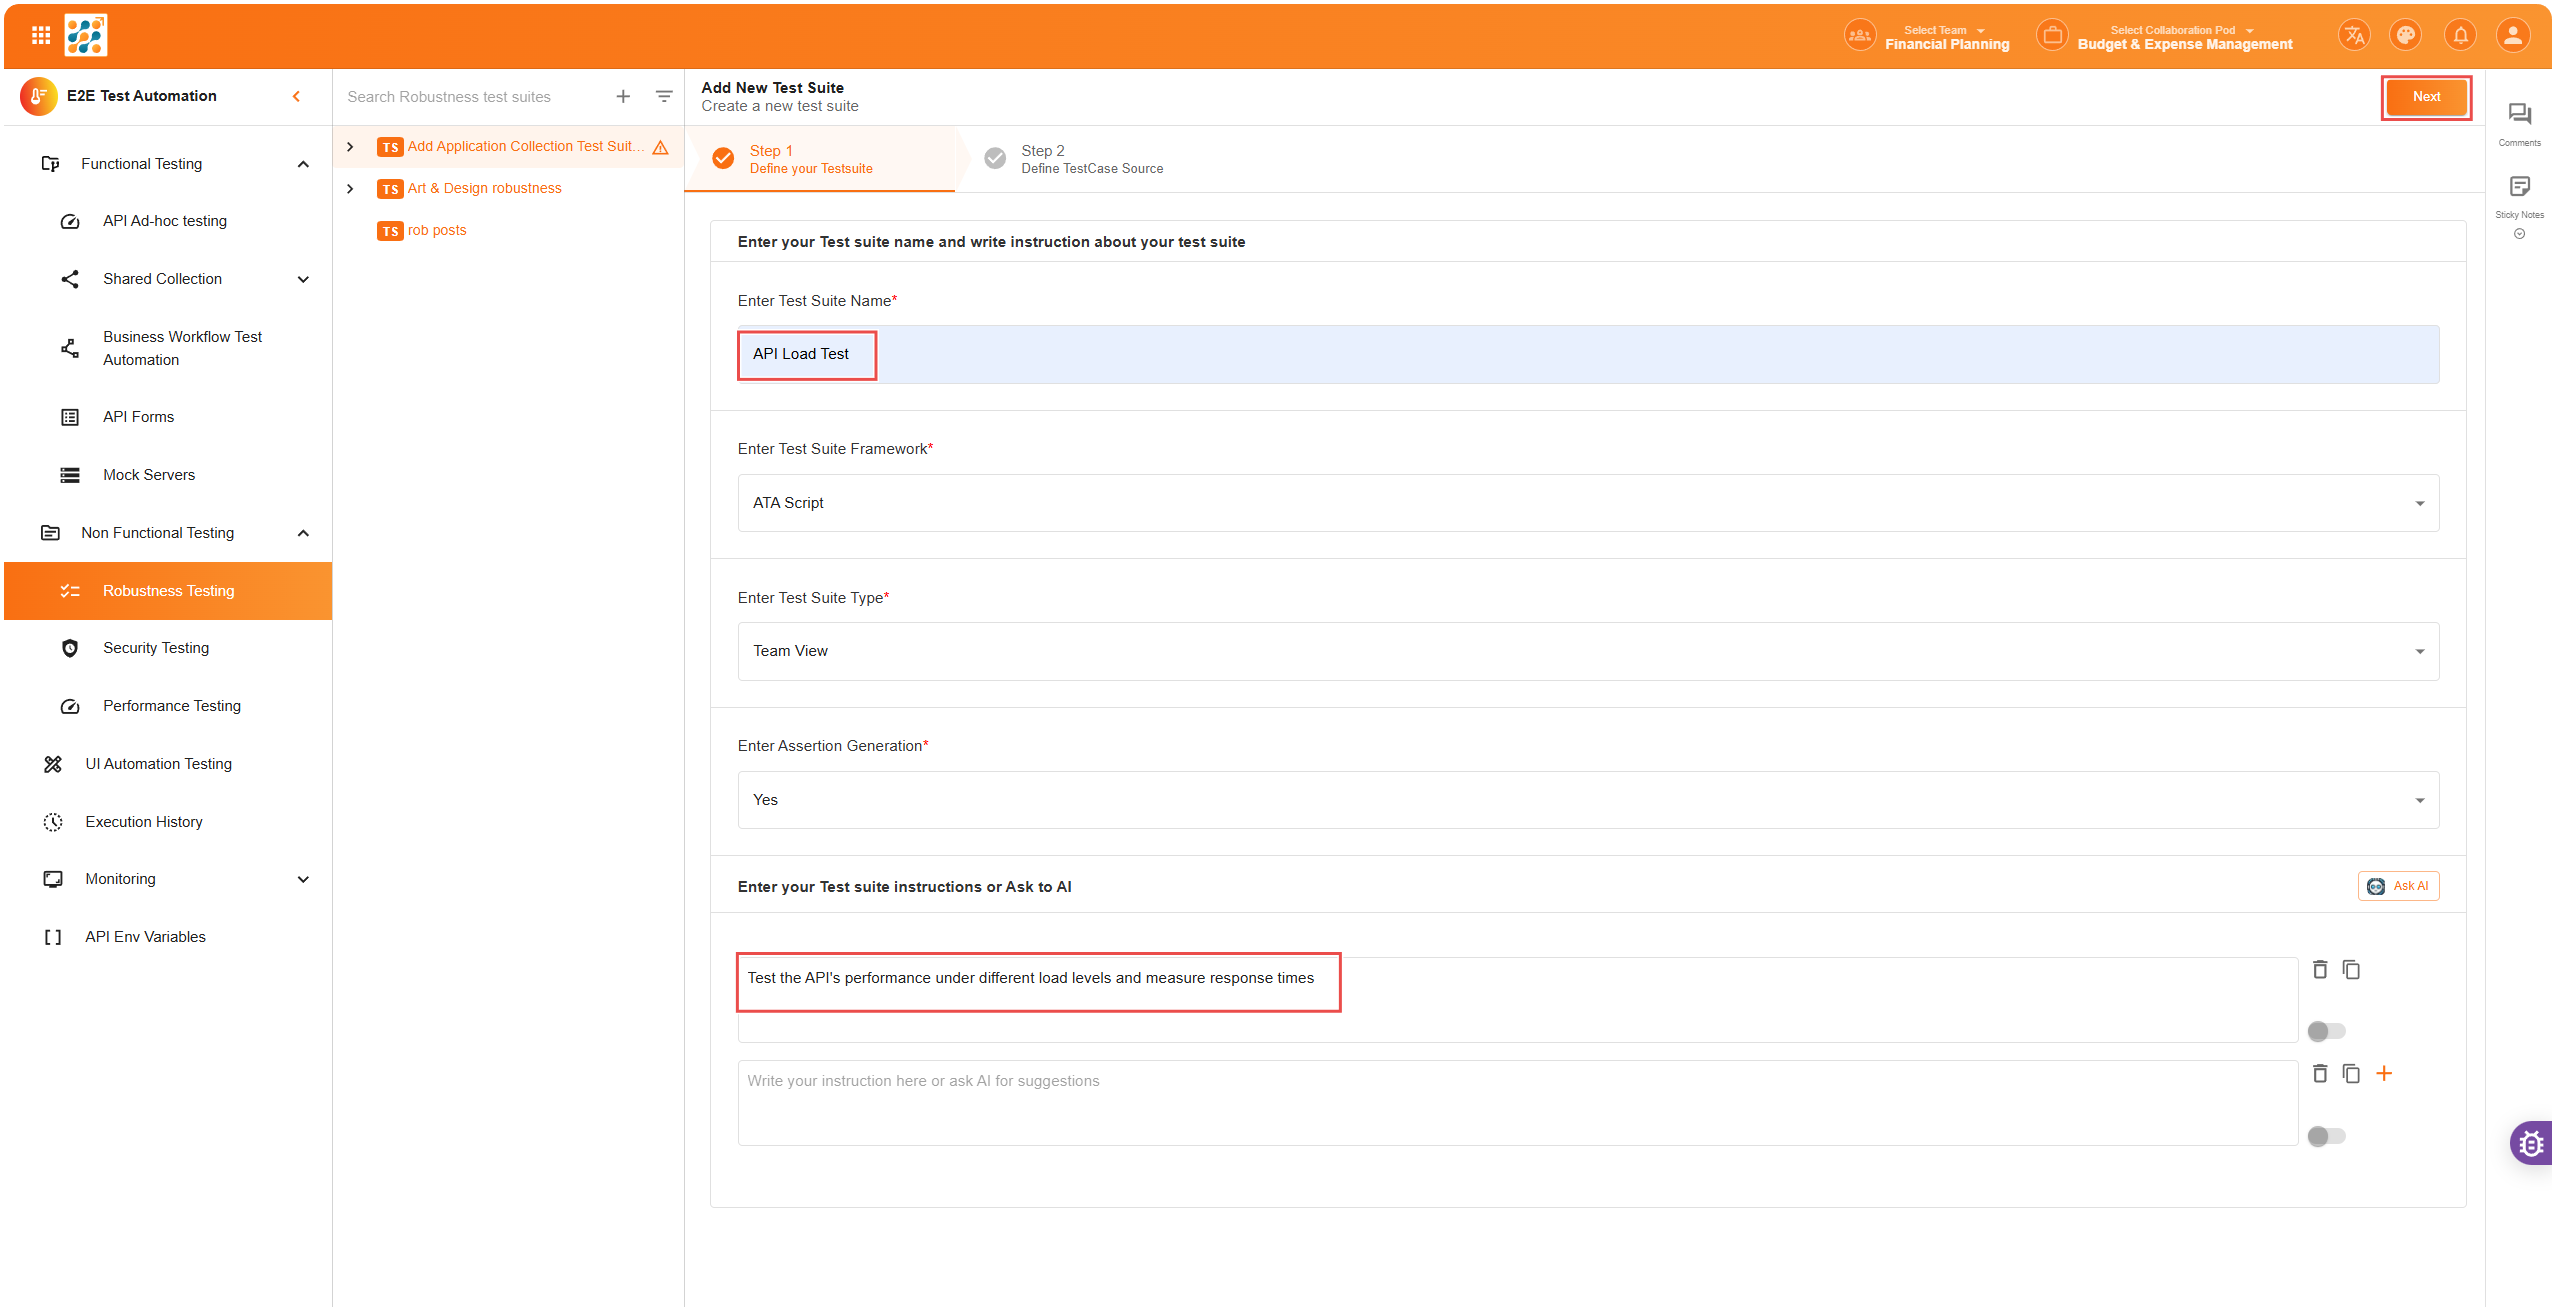
- Enter the Suite Name and AI Instructions:
- In Step 1, give your test suite a name (e.g., “API Load Test”)
- Add AI instructions to guide the test generation process (e.g., “Test the API’s performance under different load levels and measure response times”)
- Click Next at the top-right corner to move to Step 2
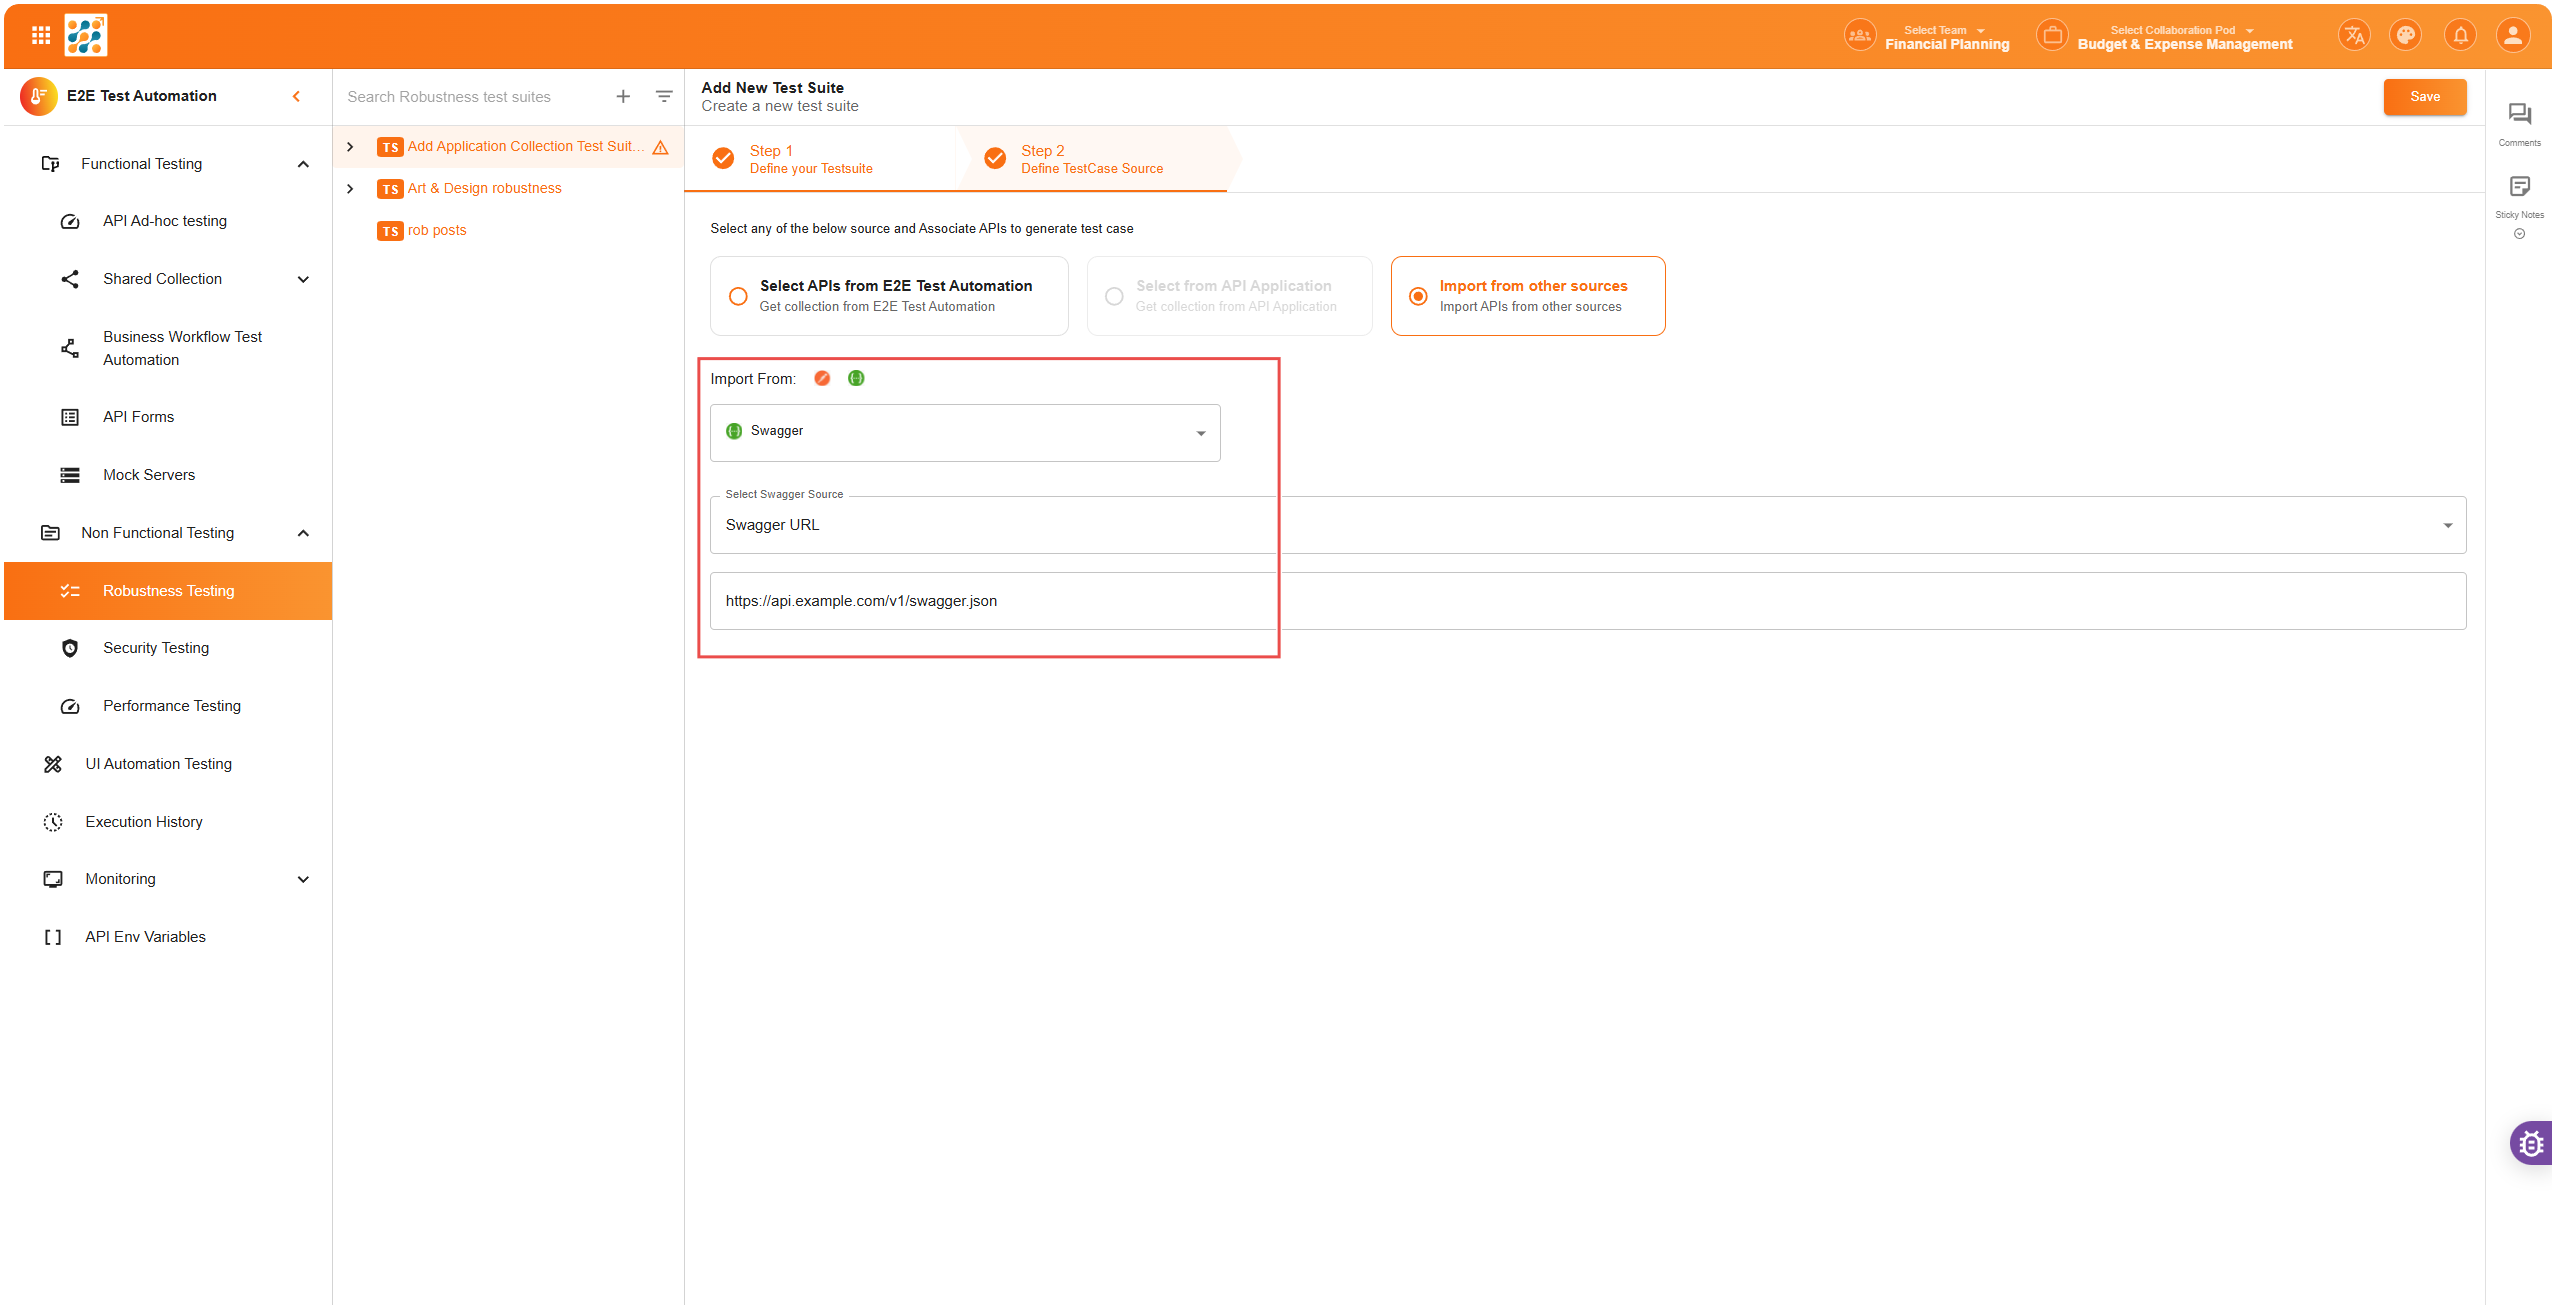
Step 2: Define the Source of Testing
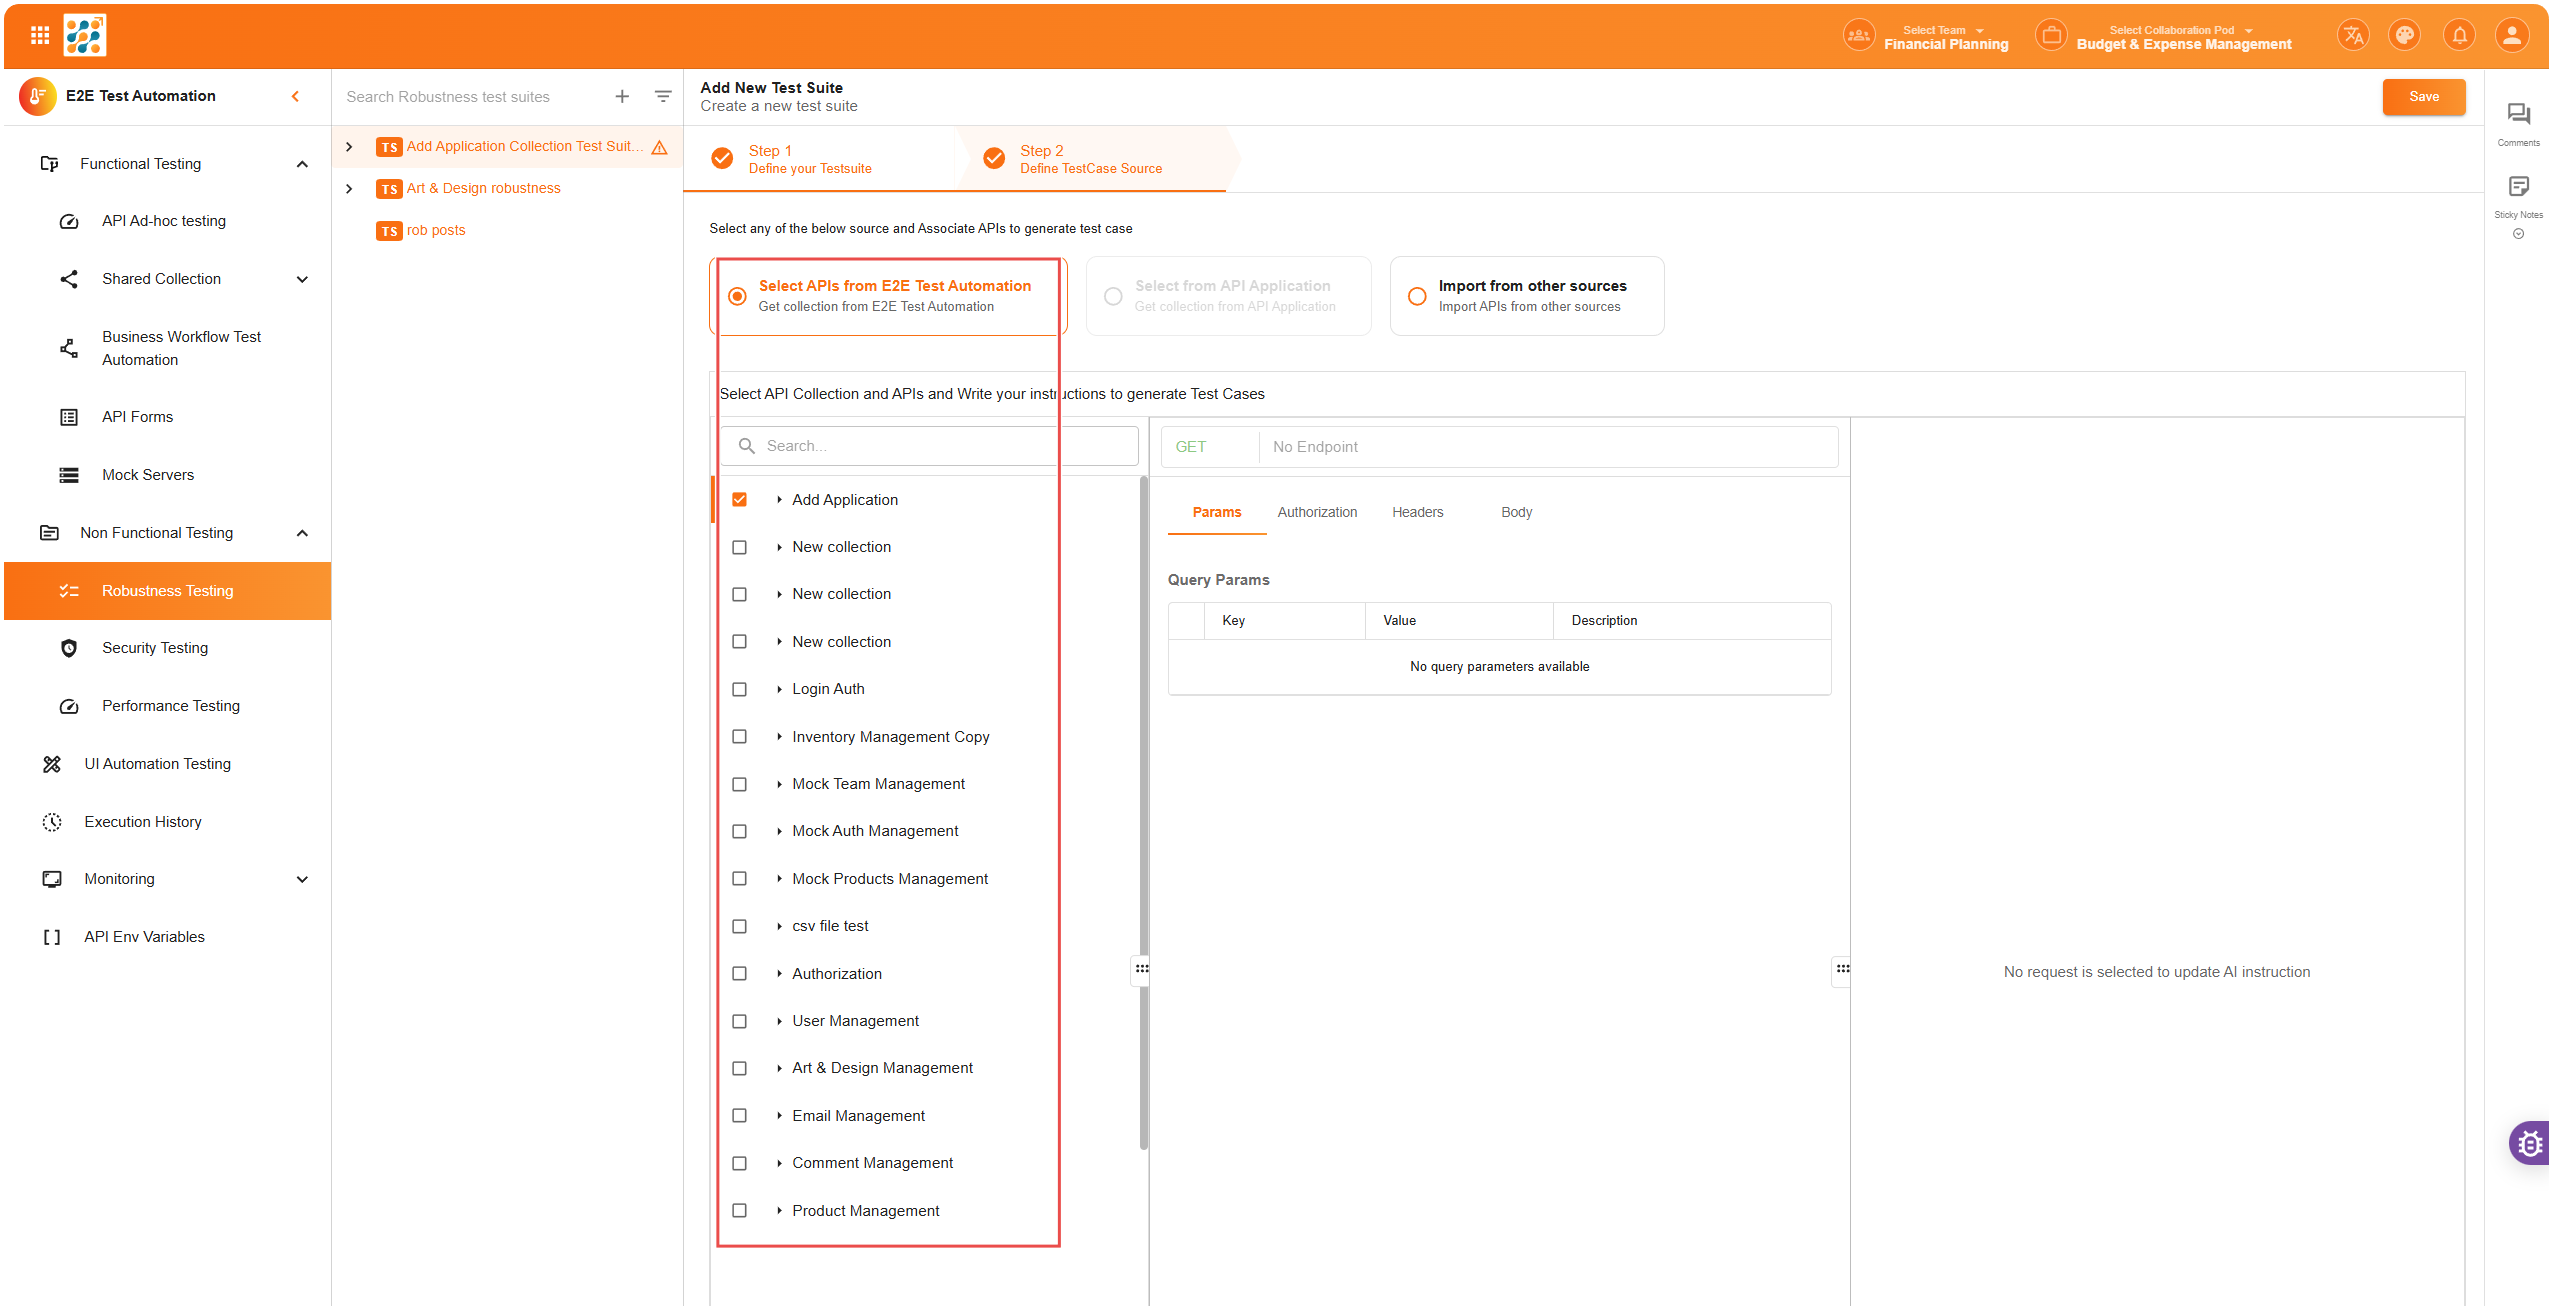
In Step 2, you will need to define where your APIs for performance testing will come from.
Steps:
- Select API Source:
- You can select APIs from API Testing Lab, which contains the APIs already existing in your system
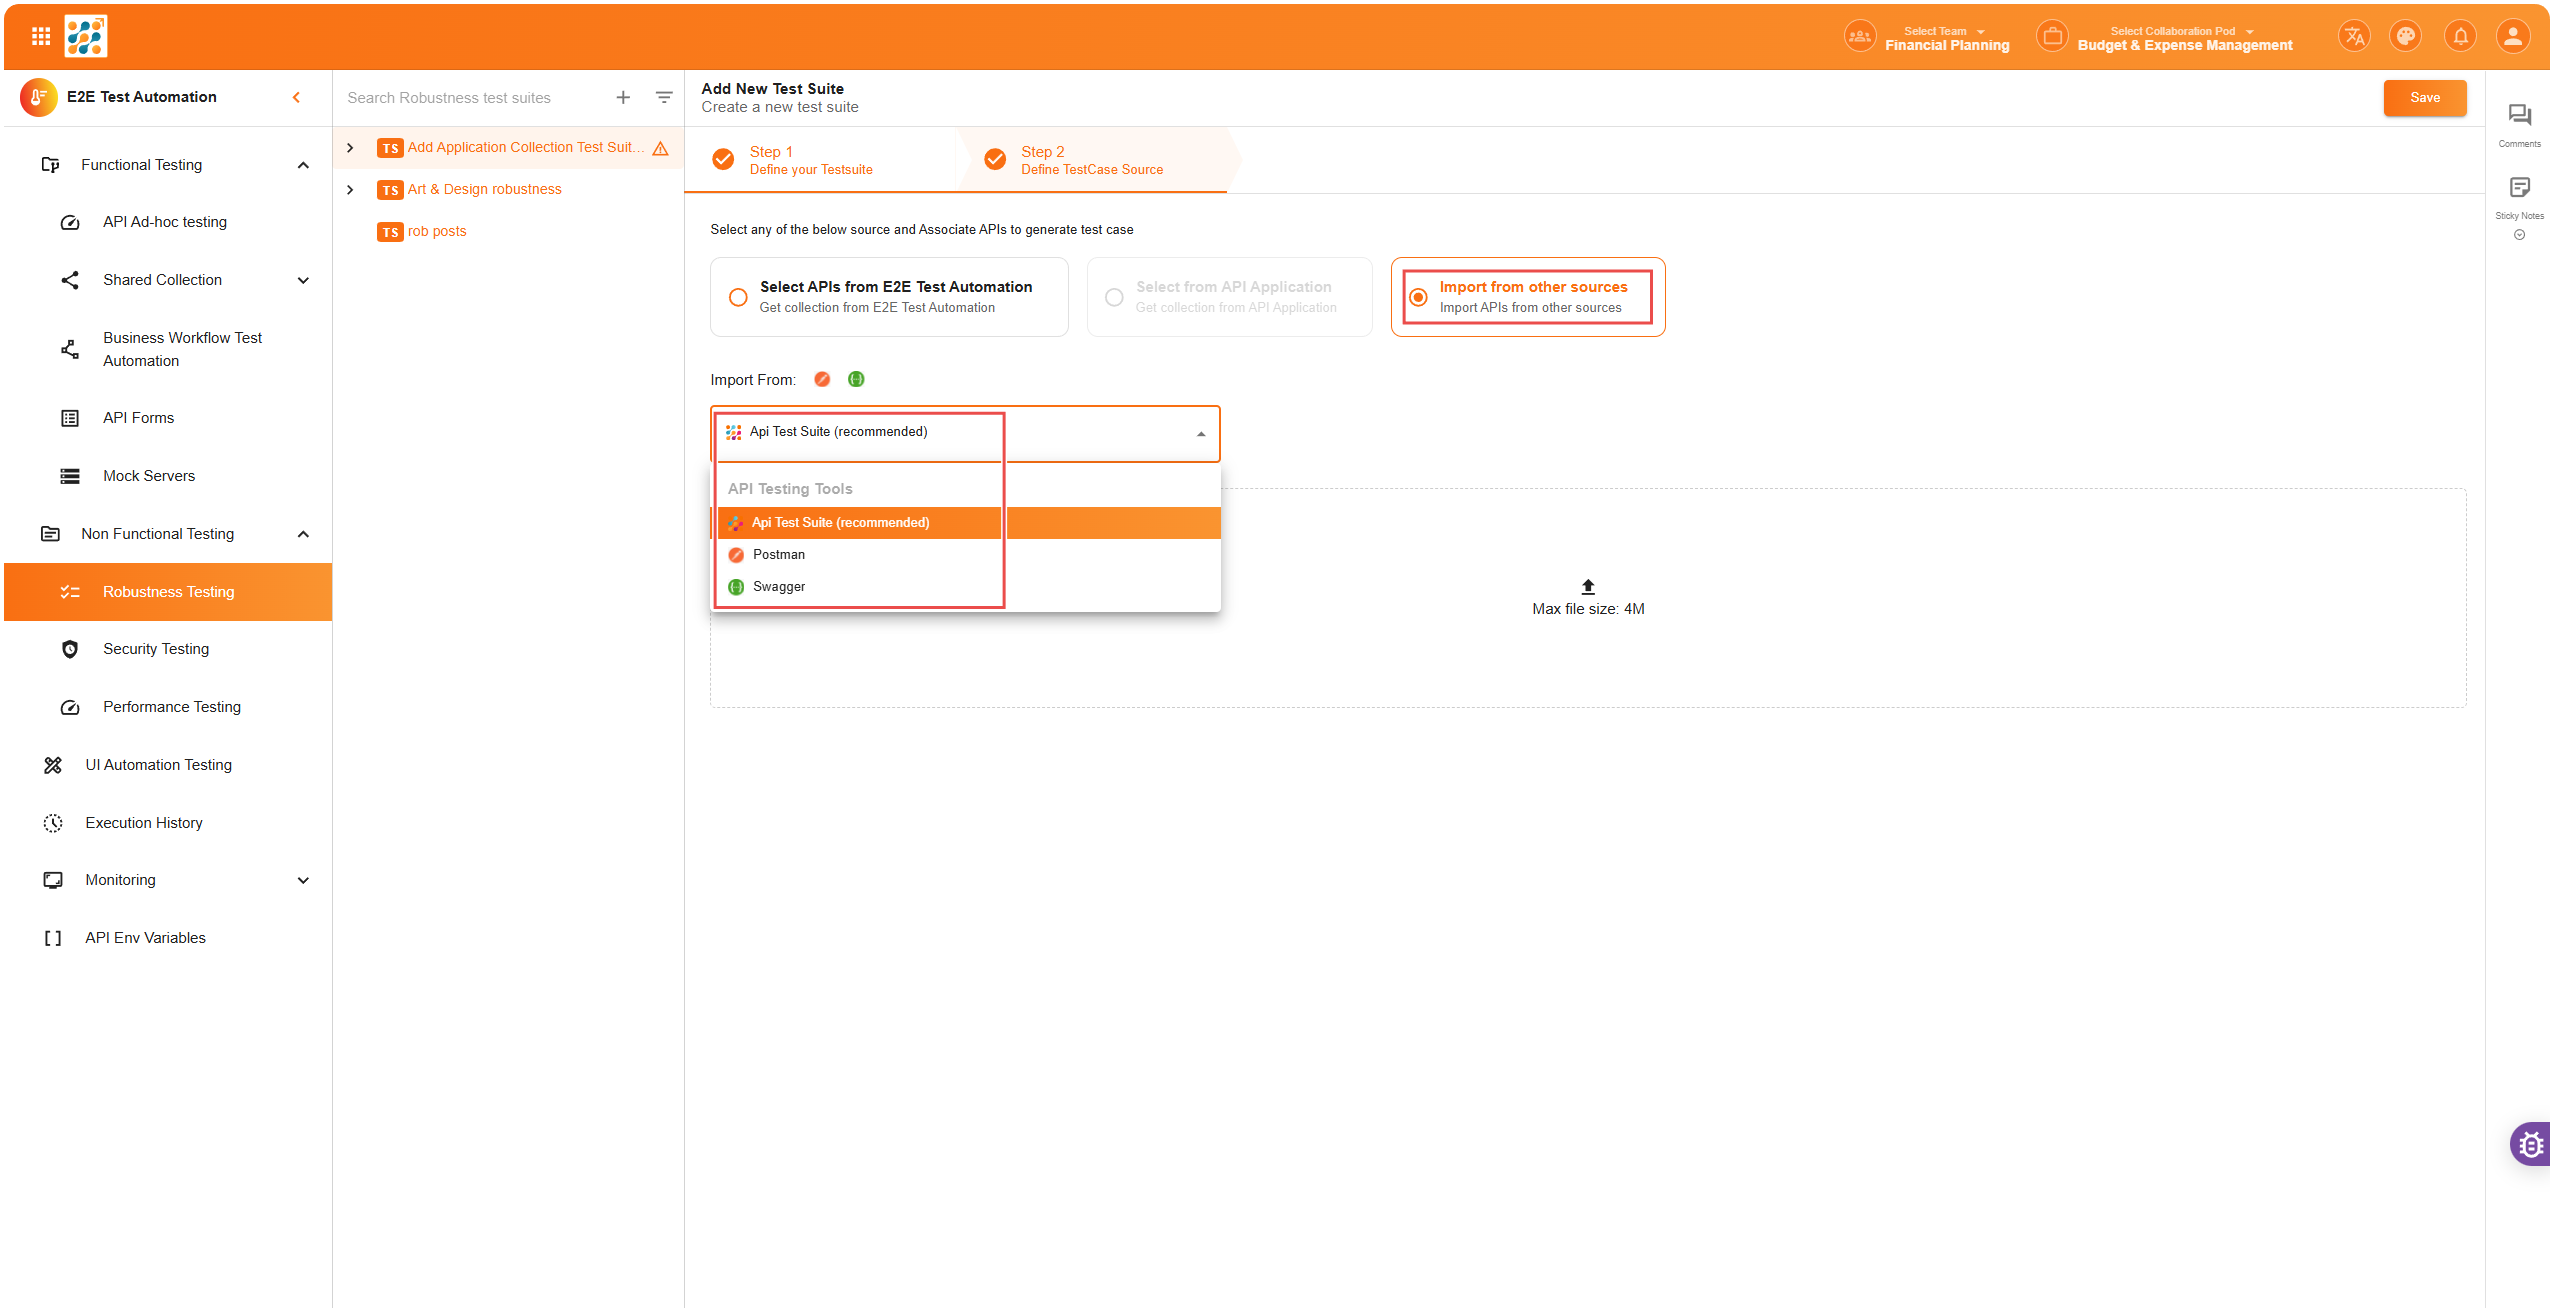
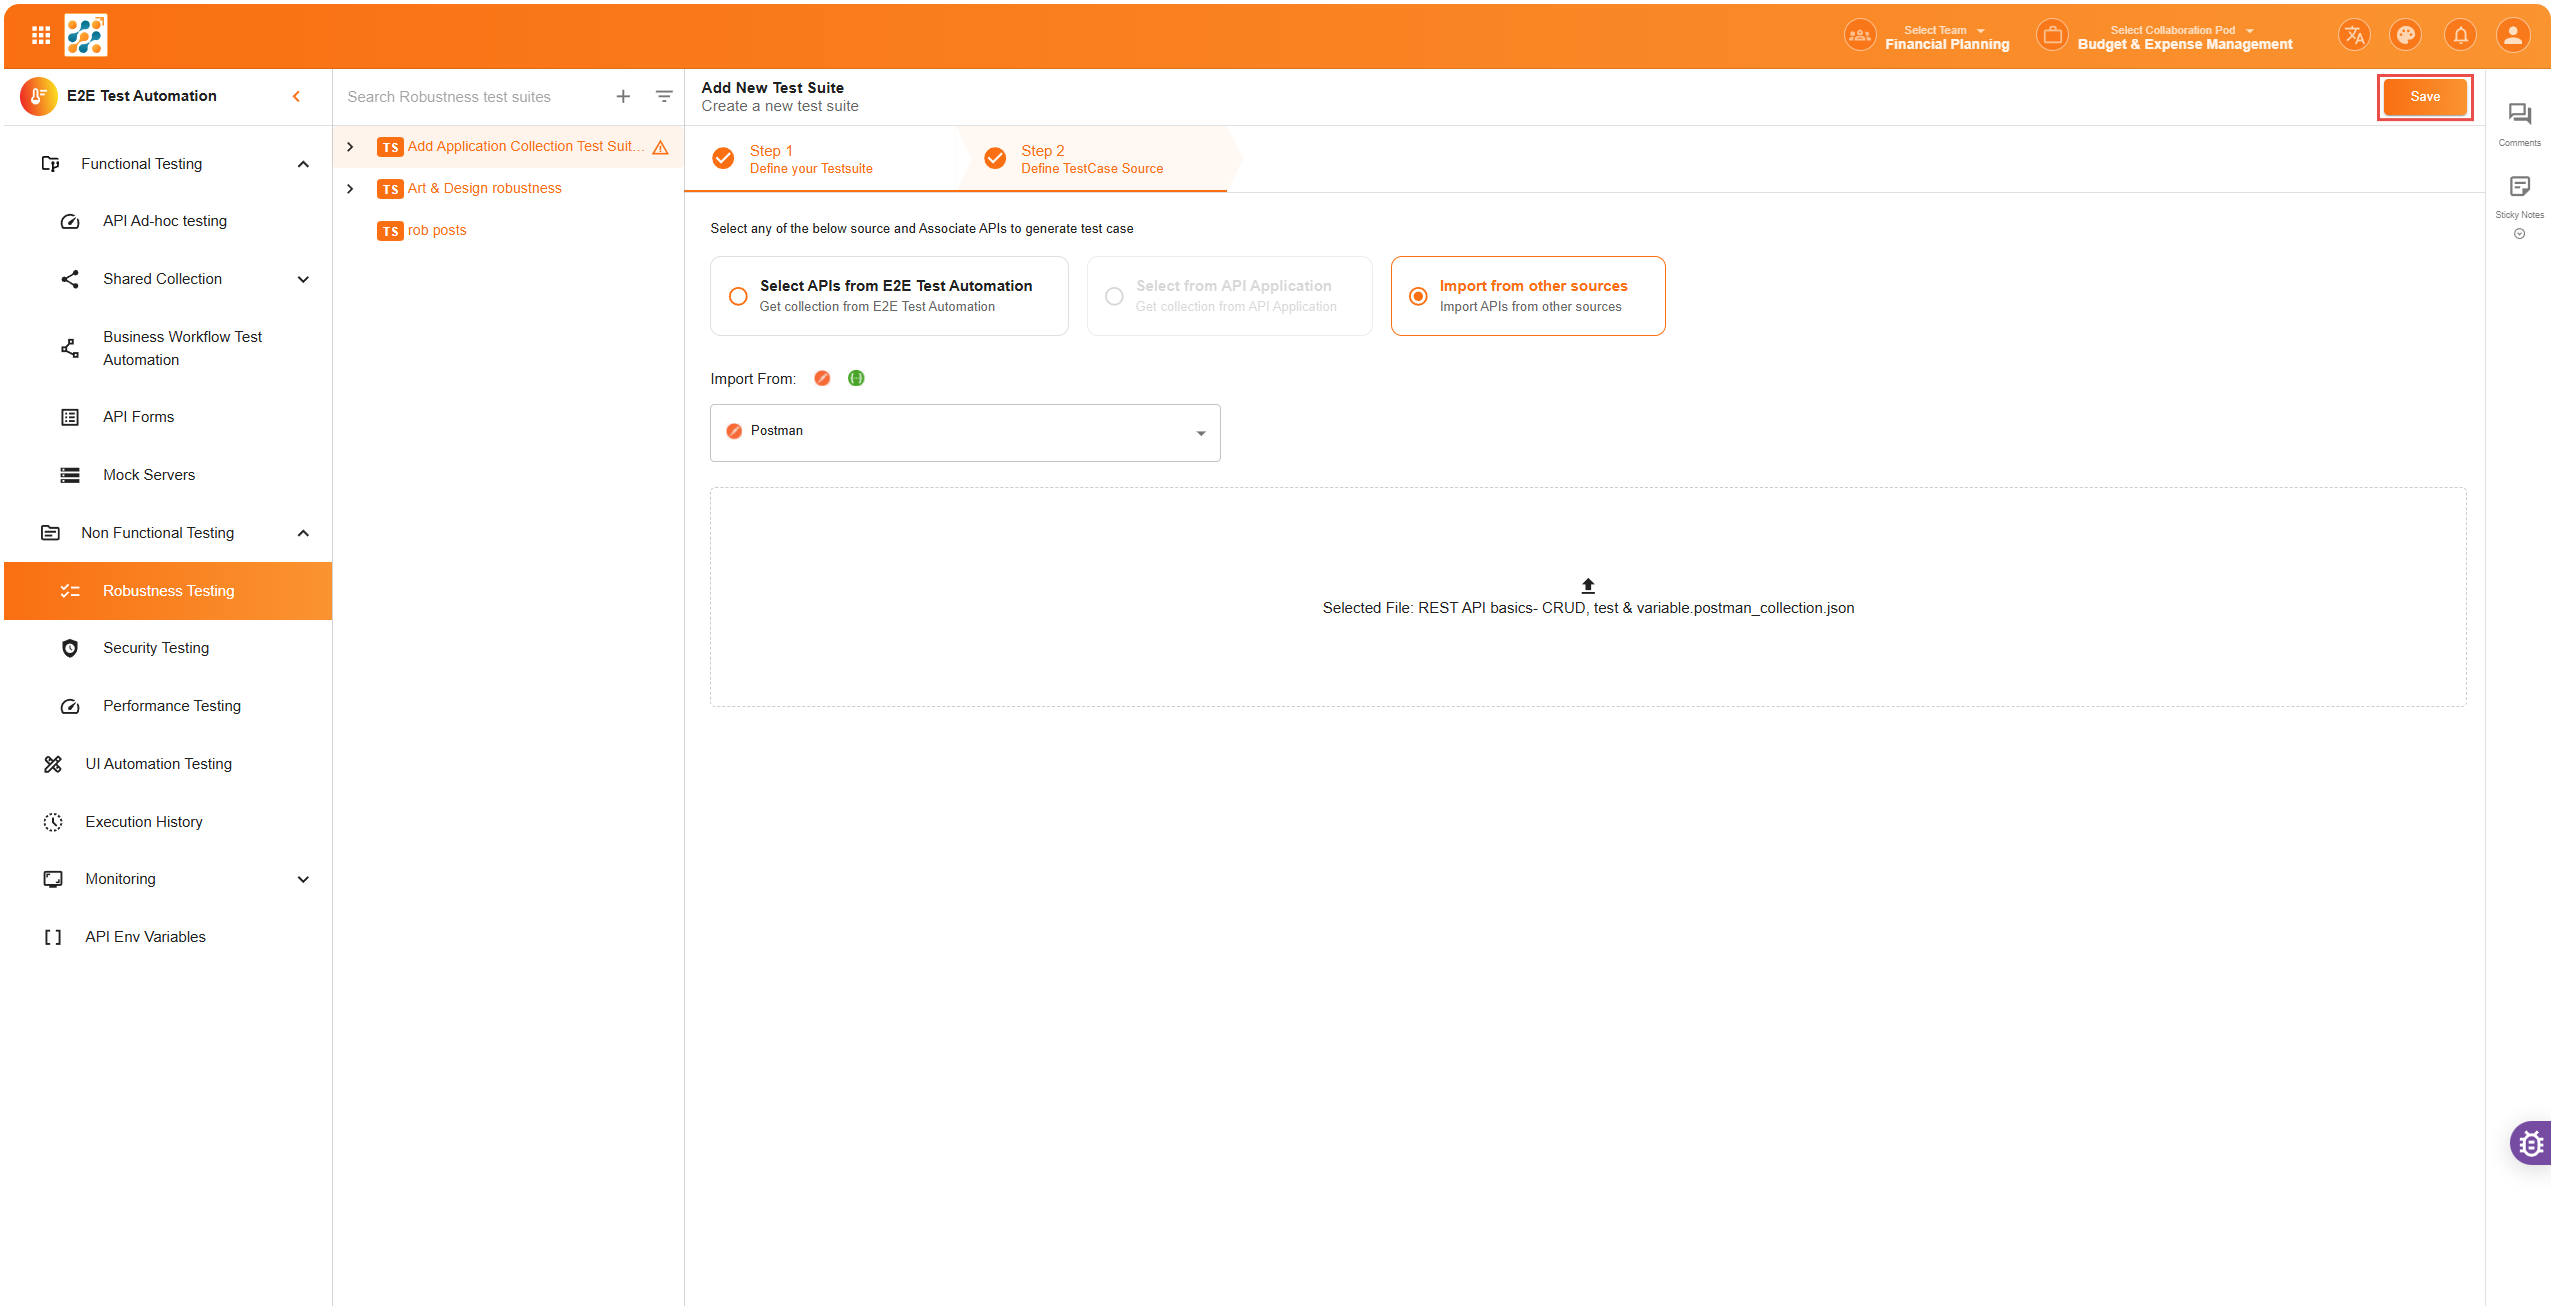
- Alternatively, you can import APIs from other sources such as:
- Swagger (via Swagger URL or Swagger file)
- Postman
- API Test Suite format
- You can select APIs from API Testing Lab, which contains the APIs already existing in your system
- Swagger Import:
- If you choose Swagger, two dropdowns will appear:
- Select Swagger Source: Choose either Swagger URL
- If you select Swagger URL, paste the Swagger URL in the provided field
- If you choose Swagger, two dropdowns will appear:
- Postman/API Test Suite Import:
- If you choose Postman or API Test Suite format, upload the respective file containing the test suite

- If you choose Postman or API Test Suite format, upload the respective file containing the test suite
- Save the Test Suite – After selecting the source, click Save to save your newly created test suite
📊 Test Suite Dashboard
Viewing the Test Suite Dashboard
After saving the test suite, E2E Test Automation will display the Test Suite Dashboard. The dashboard provides an overview of the test suite’s details, such as:
- Number of Collections – The total number of API collections included in the test suite
- HTTP Requests – The number of individual HTTP requests within the suite
- Average Generation Time – The average time it takes to generate the test cases
- Total Tests Available – The total number of tests available in the suite
- Total Re-generations – The number of times tests have been re-generated
- Prompt Tokens – Tokens used for generating prompts in AI-powered test cases
- Completion Tokens – Tokens used for AI response completions
- Total Tokens Used – Total tokens consumed in the entire test suite
🧪 Generating Performance Test Cases
Once your test suite is set up, you can generate the performance test cases that will simulate different load conditions on your APIs.
Step 1: Click “Generate All”
After setting up your test suite, click the “Generate All” button to generate performance test cases for all the APIs in the suite.
Step 2: Define Load Type
Load Types:
- Fixed Load – Simulate a fixed number of requests per second (e.g., 100 requests per second)
- Ramp-Up Load – Gradually increase the load by starting with a low number of requests and incrementing it over time (e.g., starting with 10 requests per second and increasing to 100 requests per second over a period of time)
- Custom Load Types – You can also define custom load patterns based on your specific use case or traffic simulation needs
Step 3: Simulate API Load
E2E Test Automation will simulate the defined load (fixed or ramp-up) and execute the requests as per your selected settings. The performance test cases will include data on:
- Response times – How quickly the API responds under different loads
- Throughput – The number of requests handled per second/minute
- Error rates – Whether errors occur under high traffic conditions
📈 Analyzing Test Results
View Test Results and Issues
After generating the performance test cases, you can view the test results and any issues related to the APIs in the suite.
Steps:
- Click on the Warning Sign – If any issues are detected during performance testing (e.g., slow response times or high error rates), a warning sign will appear. Click on it to view the issues related to that particular API collection
- Test Suite Analysis Pop-up – A pop-up window will display the following: Under Requests with Issues, you will see a list of APIs that encountered issues during testing. The issues could be anything from slow response times to high error rates under load.
- Example:
Requests with Issues: - Login: High response time under load - Get Users: 50% failure rate under ramp-up load- Total Number of Tests – The number of tests run in the suite
- Valid Tests – Tests that passed successfully
- Issues – Any failures or issues encountered during the tests
- Detailed Logs – E2E Test Automation provides detailed logs to help you troubleshoot any issues, such as slow response times or failed requests. These logs allow you to fix problems quickly and improve the performance of your APIs
📋 Performance Test Analysis Interface
After running the tests, E2E Test Automation provides an in-depth analysis of the test results. The Test Suite Analysis interface shows you a summary of your tests and their results:
- Total Tests – The total number of tests executed
- Valid Tests – The number of tests that passed successfully
- Issues – The number of failed tests or errors encountered during execution
- Requests with Issues – A list of requests that failed, with a description of the issue (e.g., high response time, errors under load)
- All Requests – A list of all requests, including those that passed and failed
This interface helps you quickly identify which APIs need attention and where improvements are necessary to handle higher loads effectively.
✅ Summary
Performance Testing in E2E Test Automation is essential for ensuring that your APIs can handle the expected traffic load. By simulating different load scenarios (fixed or ramp-up), you can identify performance bottlenecks, optimize scalability, and ensure that your APIs remain responsive even under stress.
The combination of automated test case generation, detailed performance metrics, and seamless integration with Swagger, Postman, and other formats makes Performance Testing in E2E Test Automation a powerful tool for ensuring the reliability and scalability of your APIs.
Happy testing! 🚀