🛠️ Creating and Managing Mock Servers
Mock Servers in E2E Test Automation provide a simple yet powerful way to simulate real API behavior without needing backend code. With mock servers, you can simulate different API responses, test your API workflows, and debug issues without affecting live environments. This guide will walk you through the entire process of creating and managing mock servers and their associated mock requests.
📋 Overview
What Are Mock Servers?
Mock servers in E2E Test Automation are simulated environments where you can define API requests and responses. These mock servers act as stand-ins for real backend servers, allowing you to test your API requests, simulate different responses, and validate functionality before going live.
Key Features:
- Simulate GET, POST, PUT, PATCH, DELETE requests and responses
- Set up custom responses for different API scenarios (success, error, etc.)
- Test without a real backend, enabling faster iteration and debugging
🚀 Creating a Mock Server
Step 1: Navigate to the Mock Server Panel
Steps:
- Log in to your E2E Test Automation account
- From the homepage, navigate to Functional Testing in the main interface
- Inside the Functional Testing, locate and click on “Mock Servers”.
Step 2: Start Creating a New Mock Server
Steps:
- If you’ve never created a mock server before, click on the “Create” button
- If you’ve already created mock servers, you’ll see a ”+” button at the top of the window
- Clicking this will display options for creating:
- Company View Mock Server – Accessible by everyone in your company
- Team View Mock Server – Shared with your selected team
- Private View Mock Server – Only you can access this server
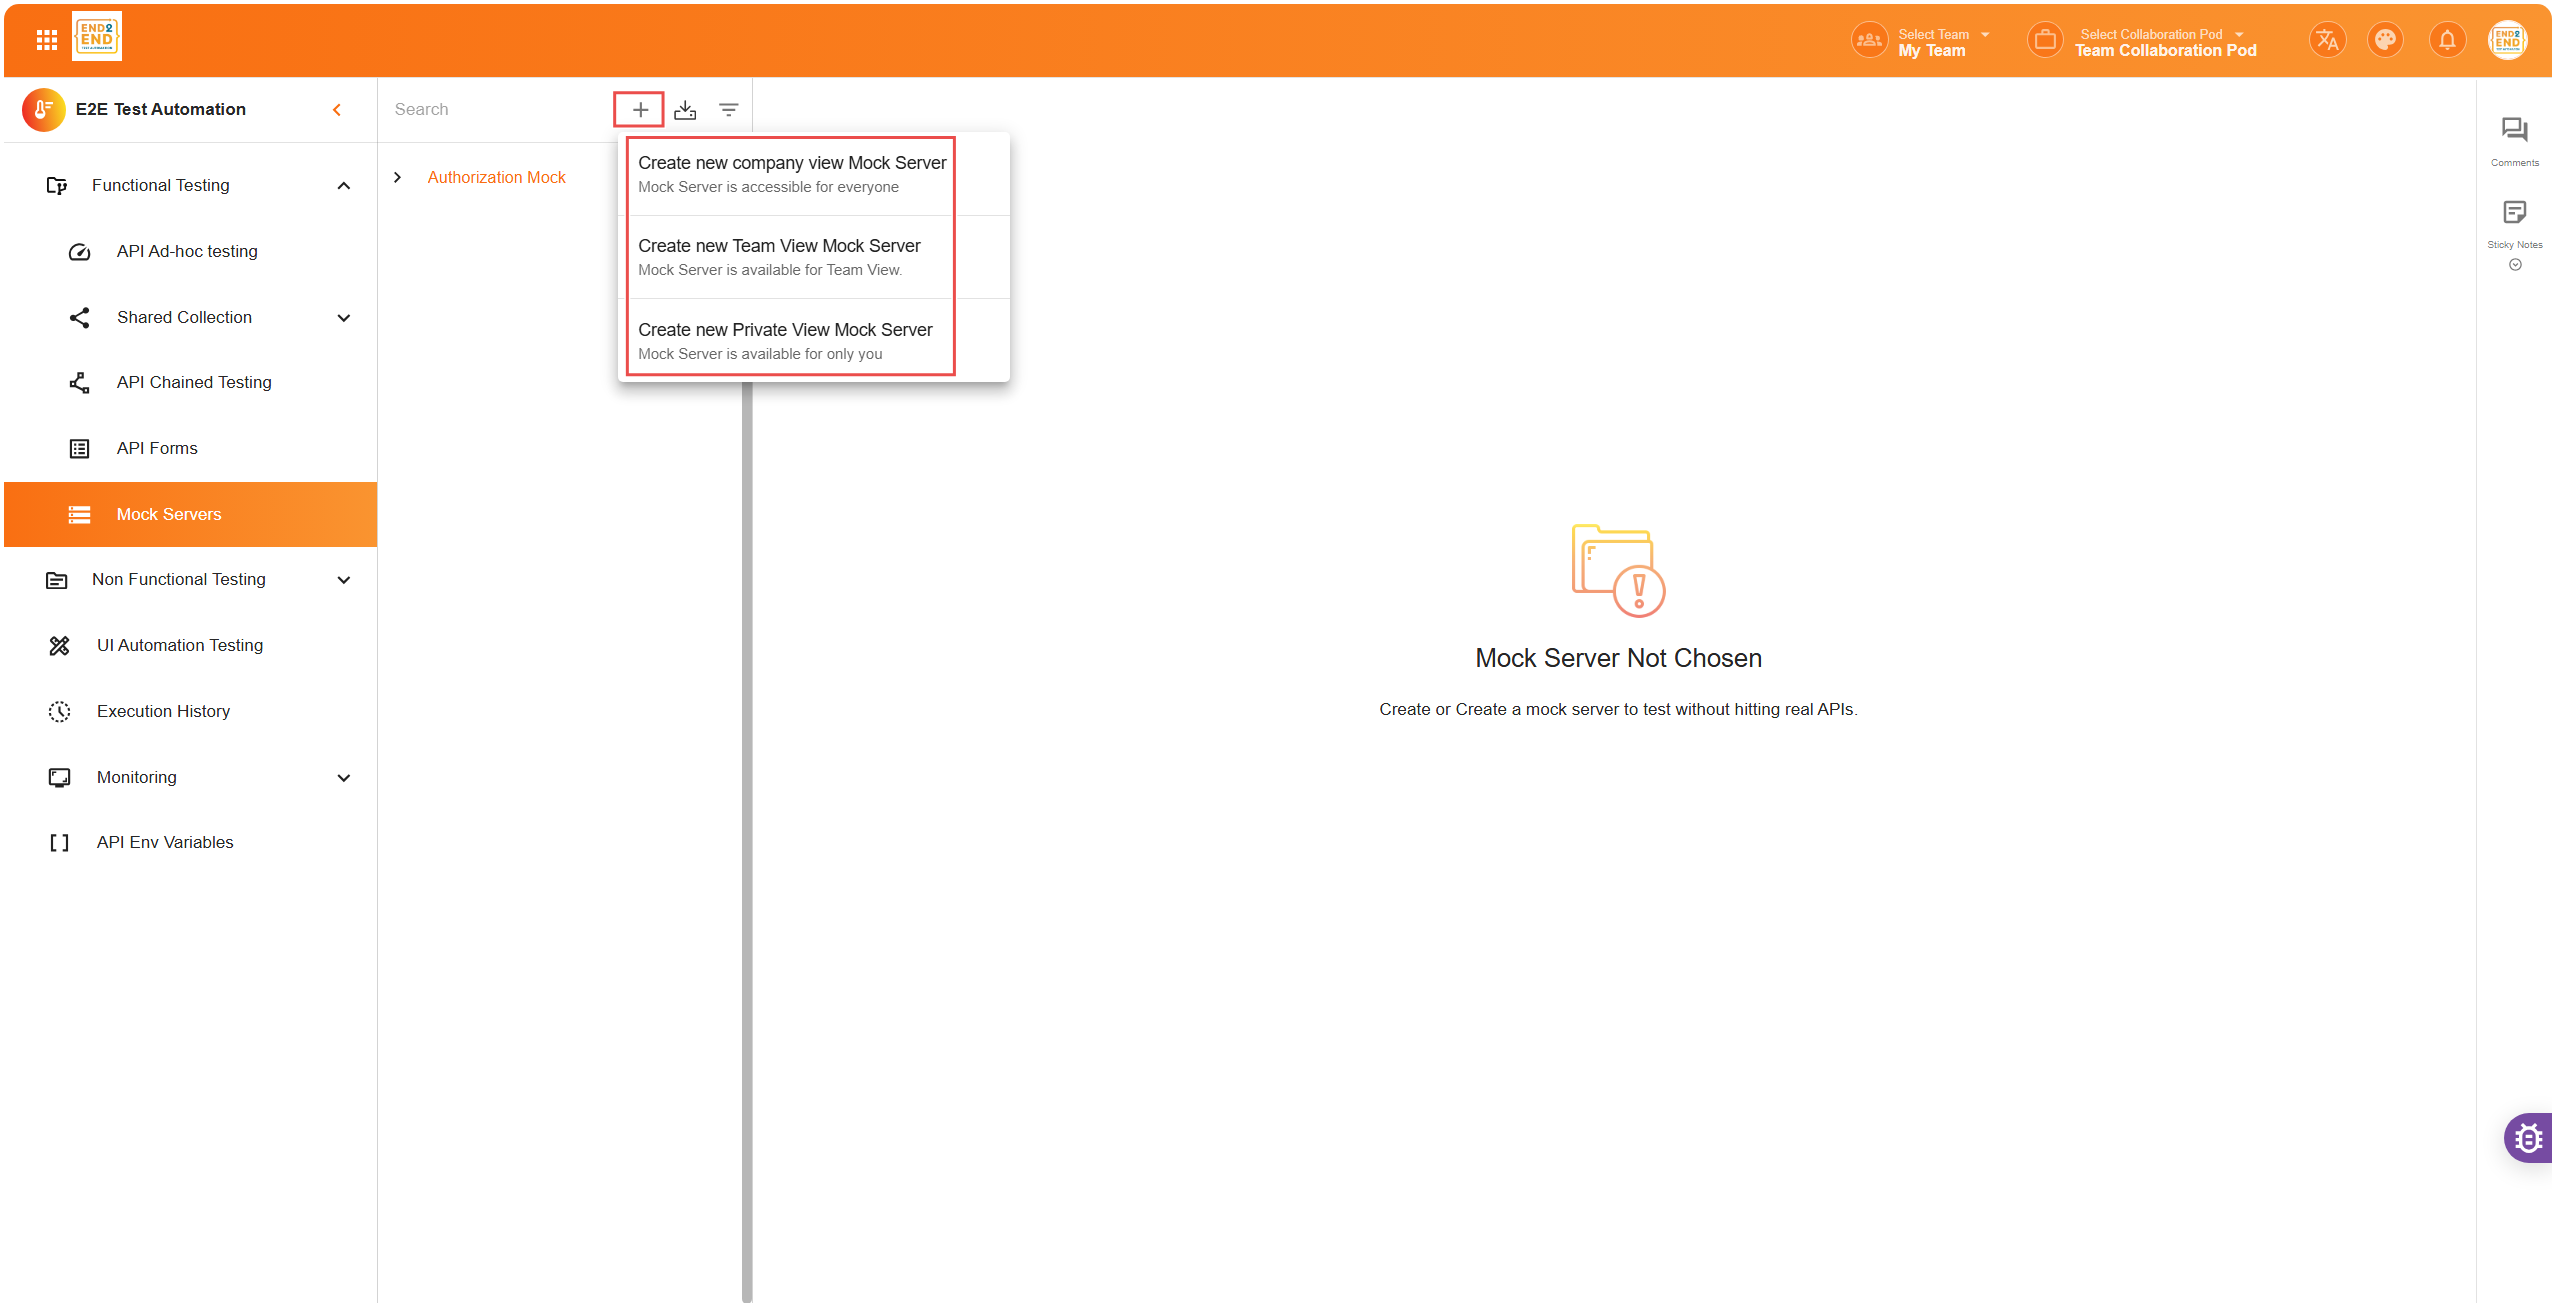
Choose the appropriate view based on your needs. Once selected, you’ll be redirected to the mock server creation page.
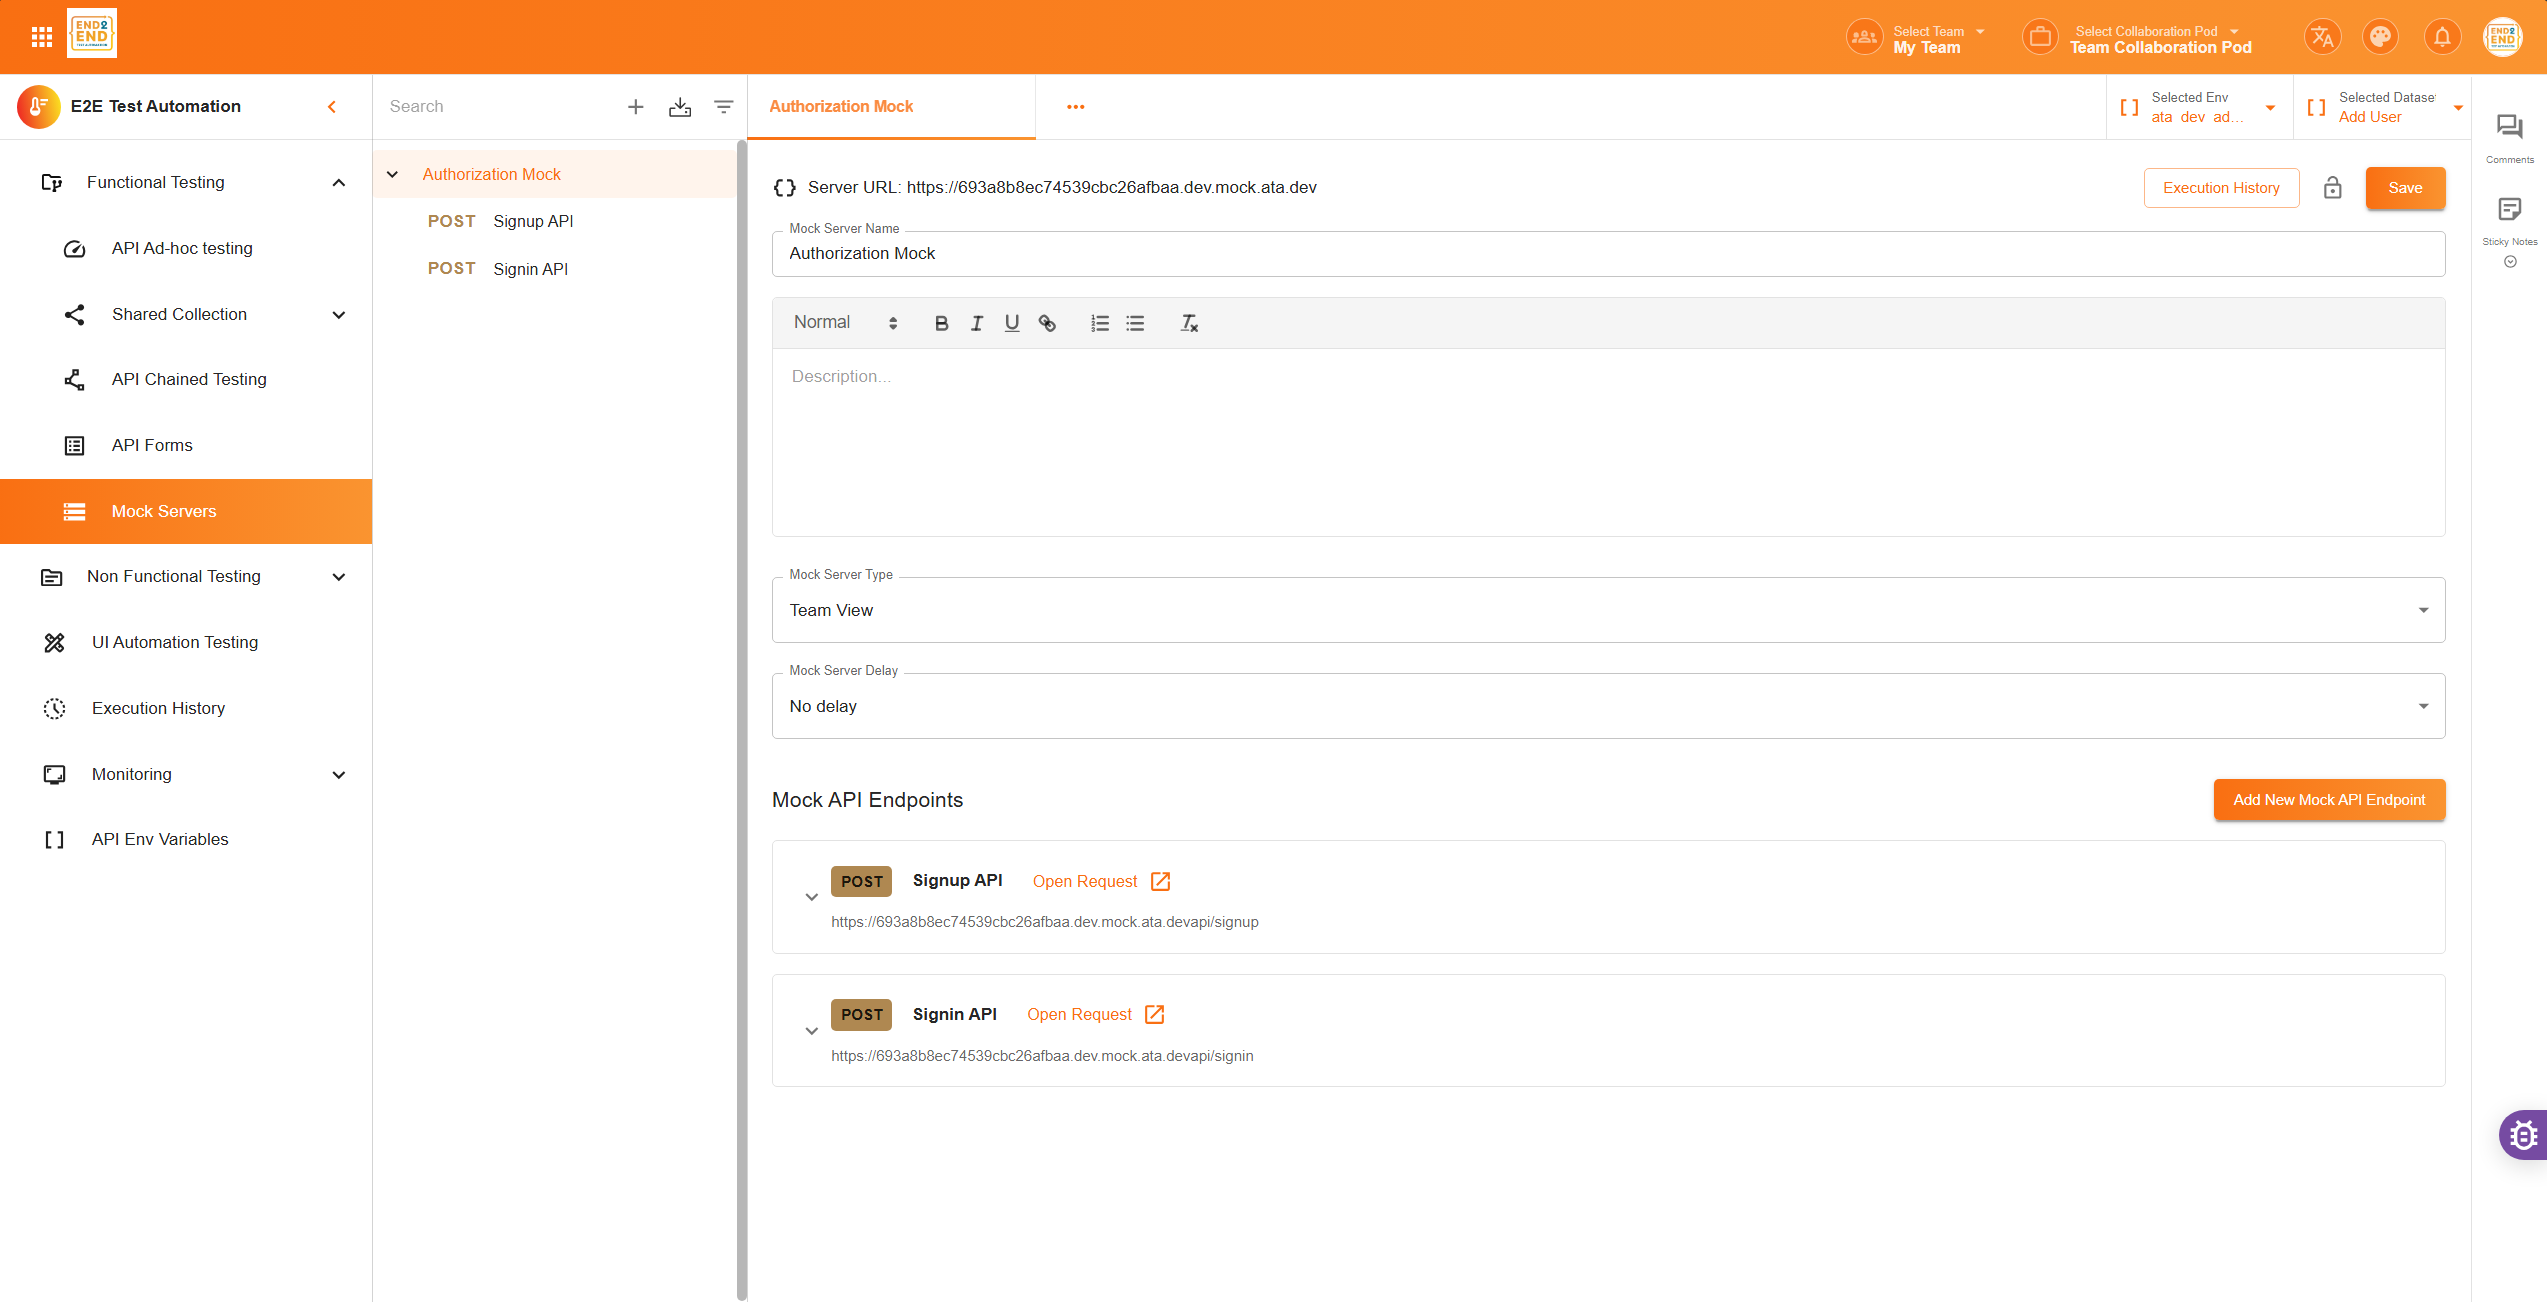
Step 3: Define the Mock Server Details
On the mock server creation page, fill in the following information:
If you wish to create the mock server for an existing collection:
- Collection Dropdown – Choose an API collection from your workspace to mock
- Environment Dropdown – Select the environment variables (like URLs or tokens) to be used for this mock server
After filling out the details, click “Save” to create your mock server.
Once saved, a server URL will be generated. This will be the base URL for all your mock endpoints created under this server.
🔧 Adding Mock Requests
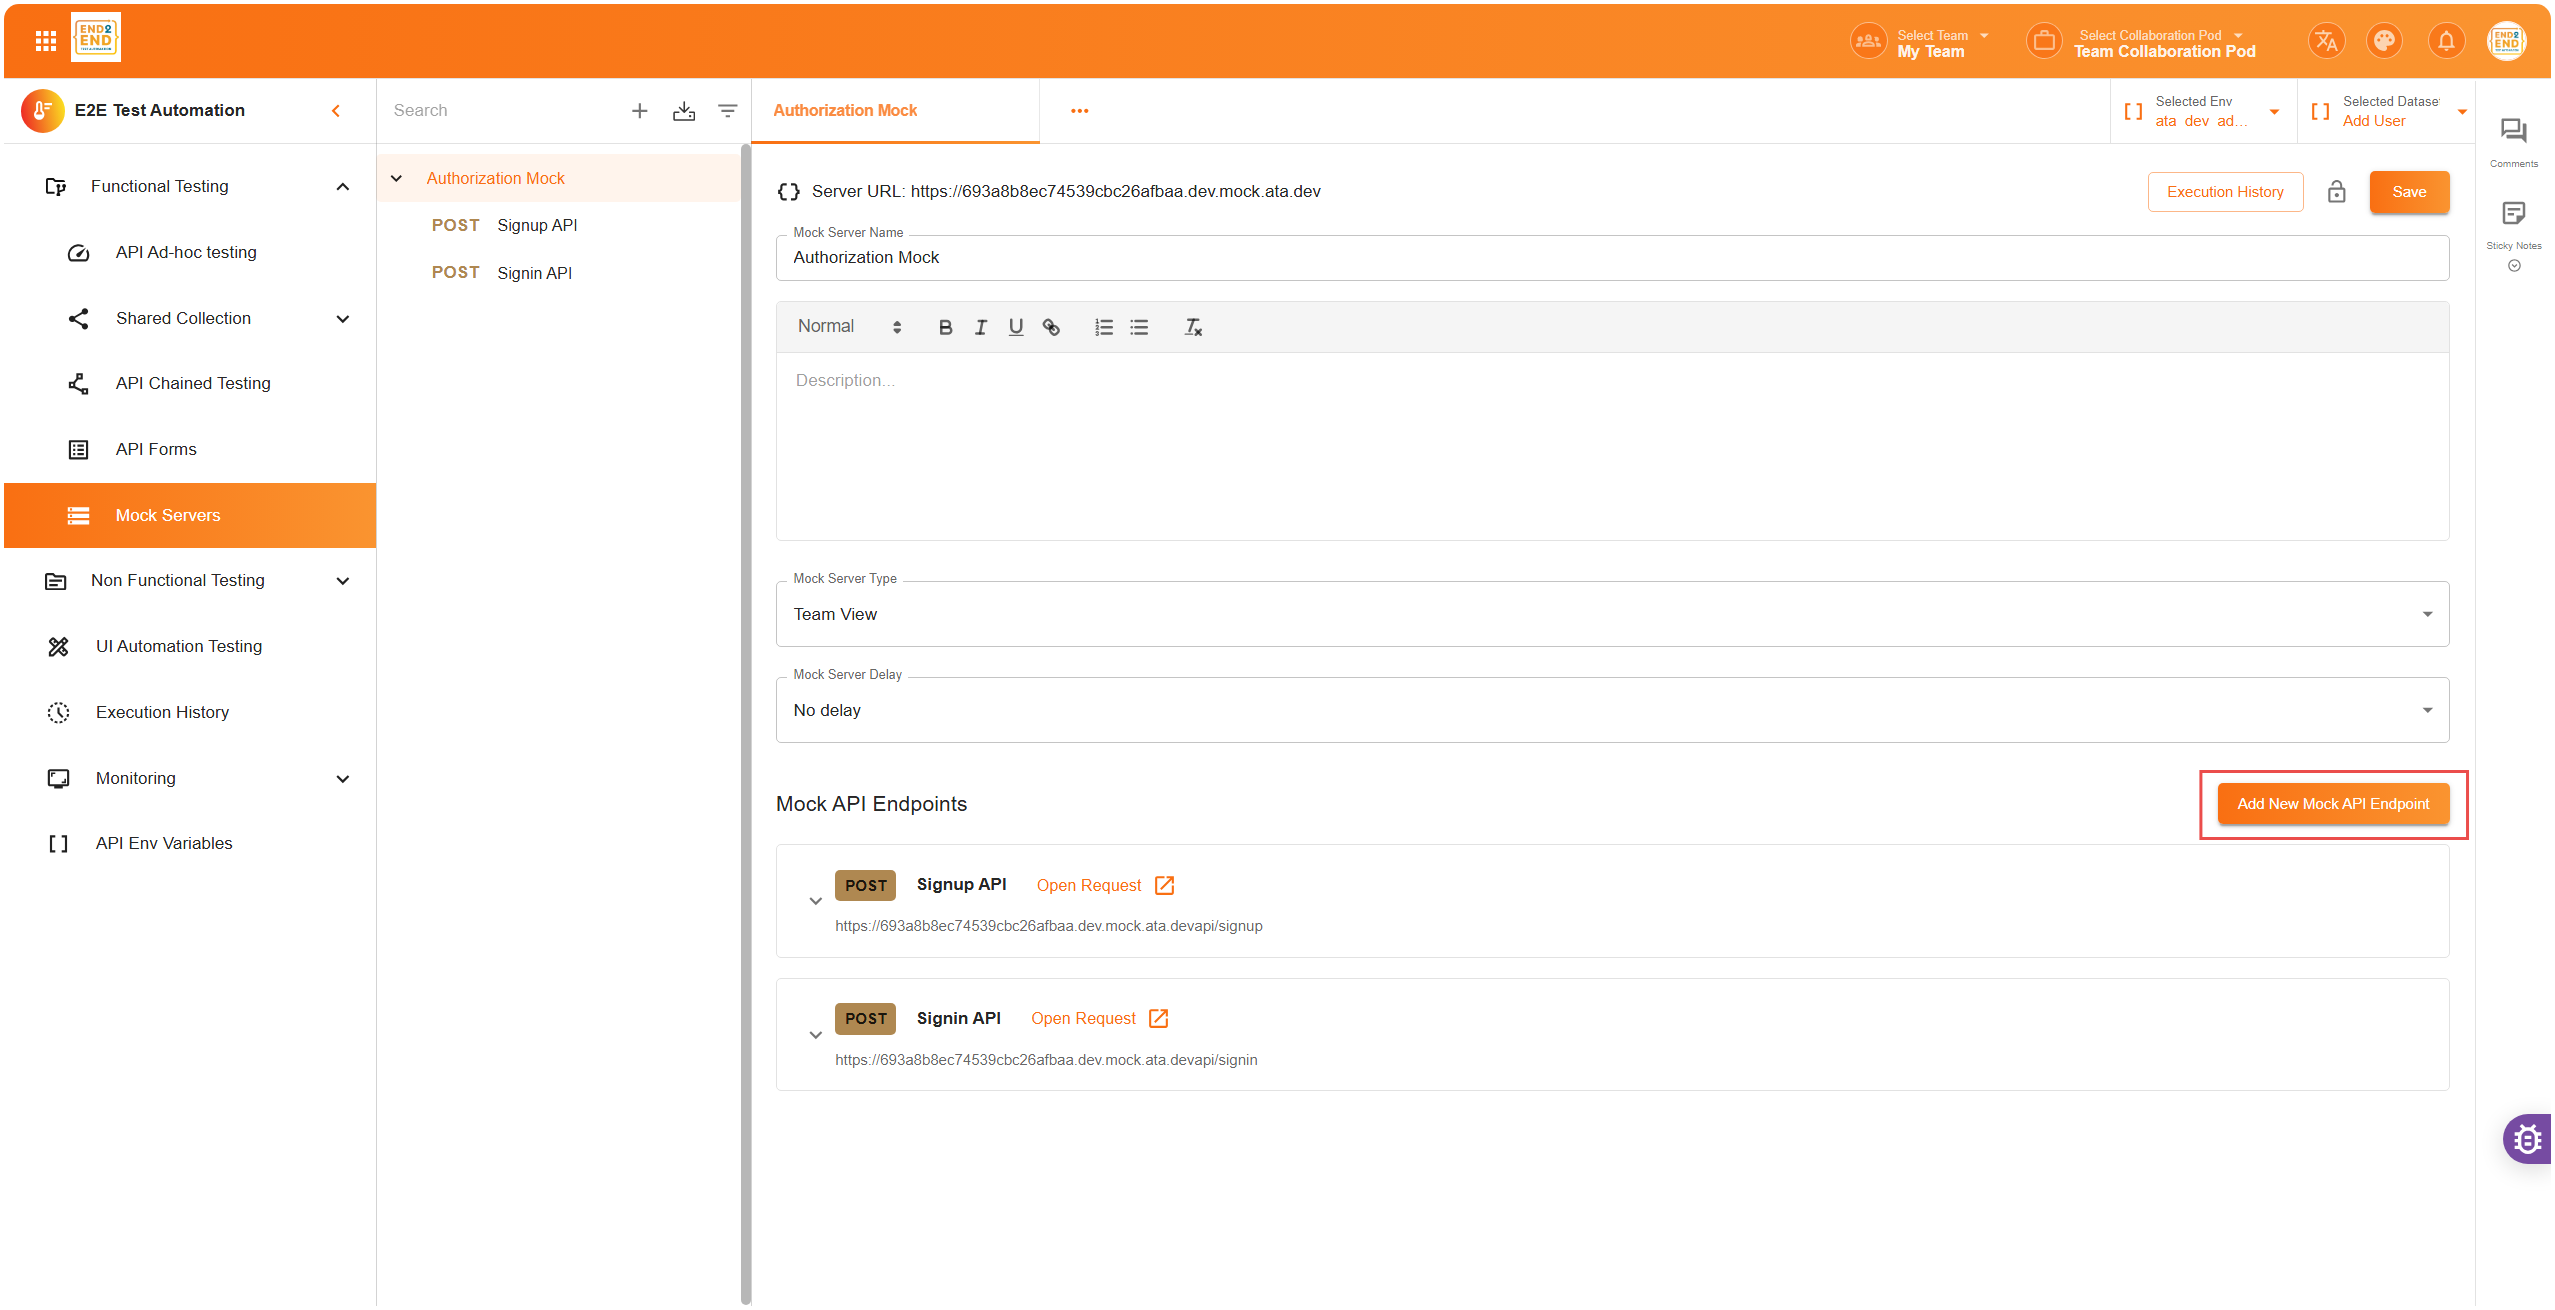
Adding a New Mock Request (Endpoint)
Once the mock server is created, you can add mock requests (endpoints) to simulate API behavior.
Steps to Add a Mock Request:
- Scroll to the Bottom – On the mock server page, scroll down and click the “Add” button
- Fill in the API Details – Define the mock API endpoint with the following fields:
- Mock API Endpoint Name – Choose a name for the endpoint (e.g., “Login Request”)
- Select the HTTP Method – Choose the request method (GET, POST, PUT, PATCH, DELETE) depending on the scenario
- Mock API Endpoint Description – Provide a brief explanation of what this endpoint does
- Path – Define the route (e.g.,
/users/login,/auth/reset). This will be appended to the mock server URL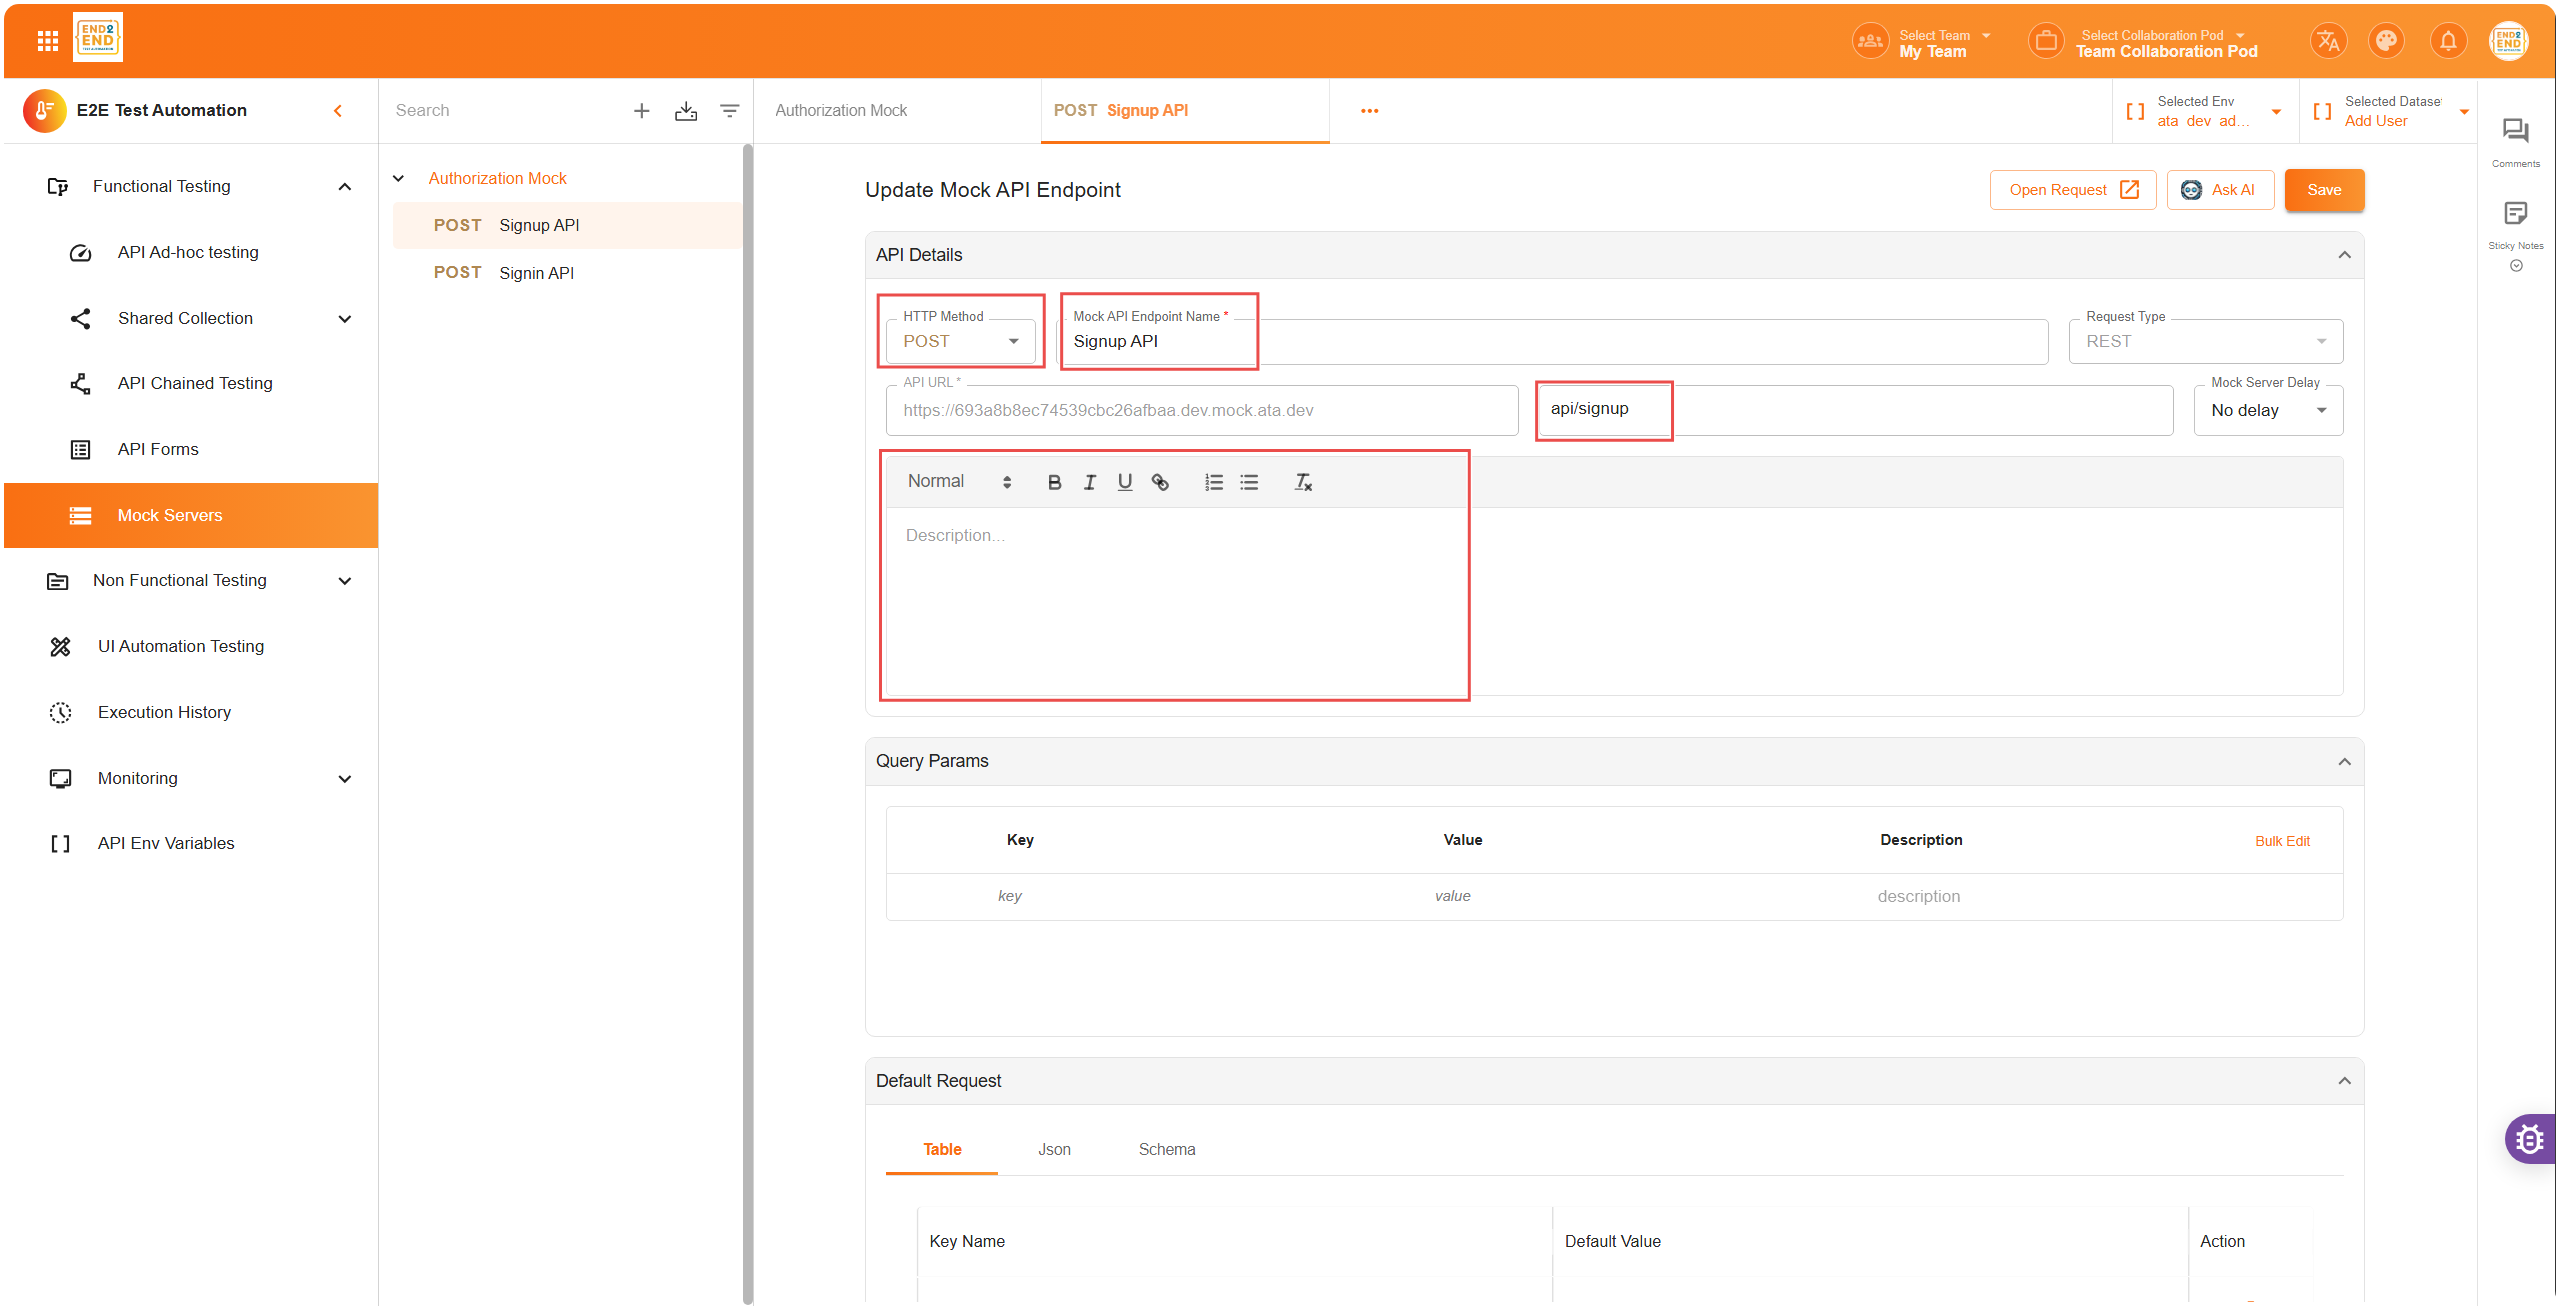
Add Query Parameters (If Needed)
Query parameters can be added to your mock request to simulate real API query strings. They are optional, but useful when your API expects filters or dynamic values in the URL.
Steps:
- Add Each Query Parameter:
- Key – The name of the parameter (e.g.,
id,userType) - Value – The example value (e.g.,
123,admin) - Description – A brief explanation of the parameter’s purpose
- Key – The name of the parameter (e.g.,
- Bulk Edit Option – If you have many parameters to add, use the Bulk Edit feature. You can enter multiple key-value pairs in the format:
id: 2; user: admin; isActive: trueThis is a quicker way to populate several parameters at once without filling out each field individually.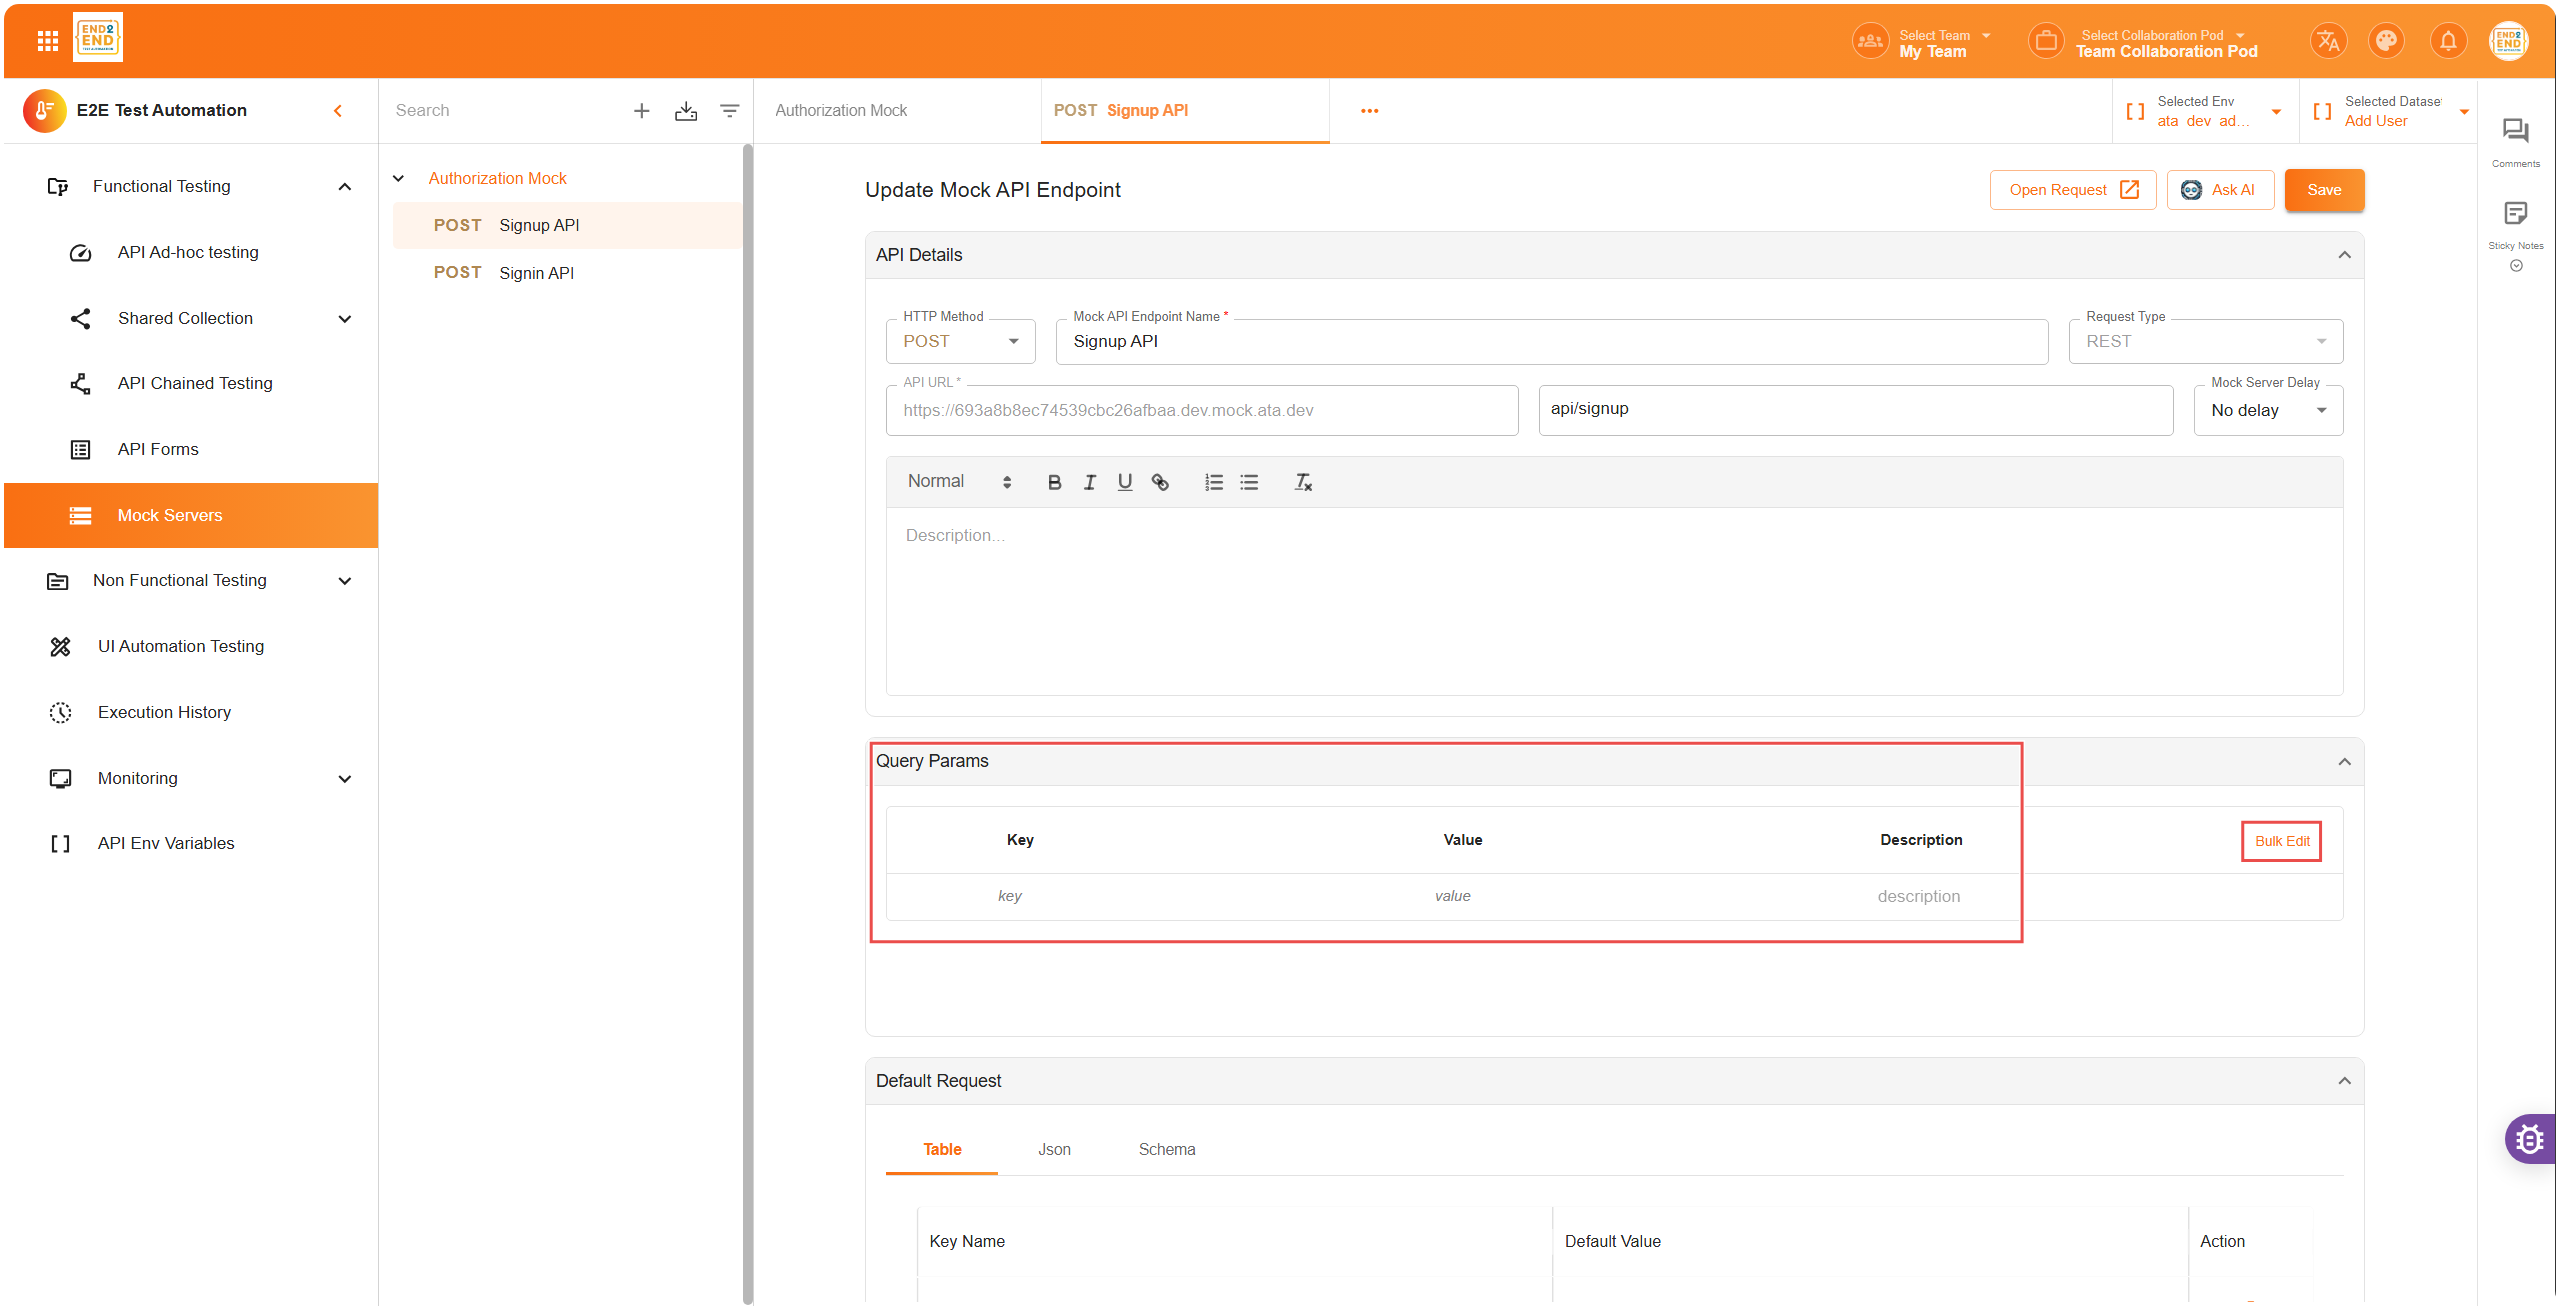
Configure the Request Body
For methods like POST, PUT, PATCH, and DELETE, you need to define the request body. Here are the available view options for adding the request body:
- Table View – Simple form to add key-value pairs
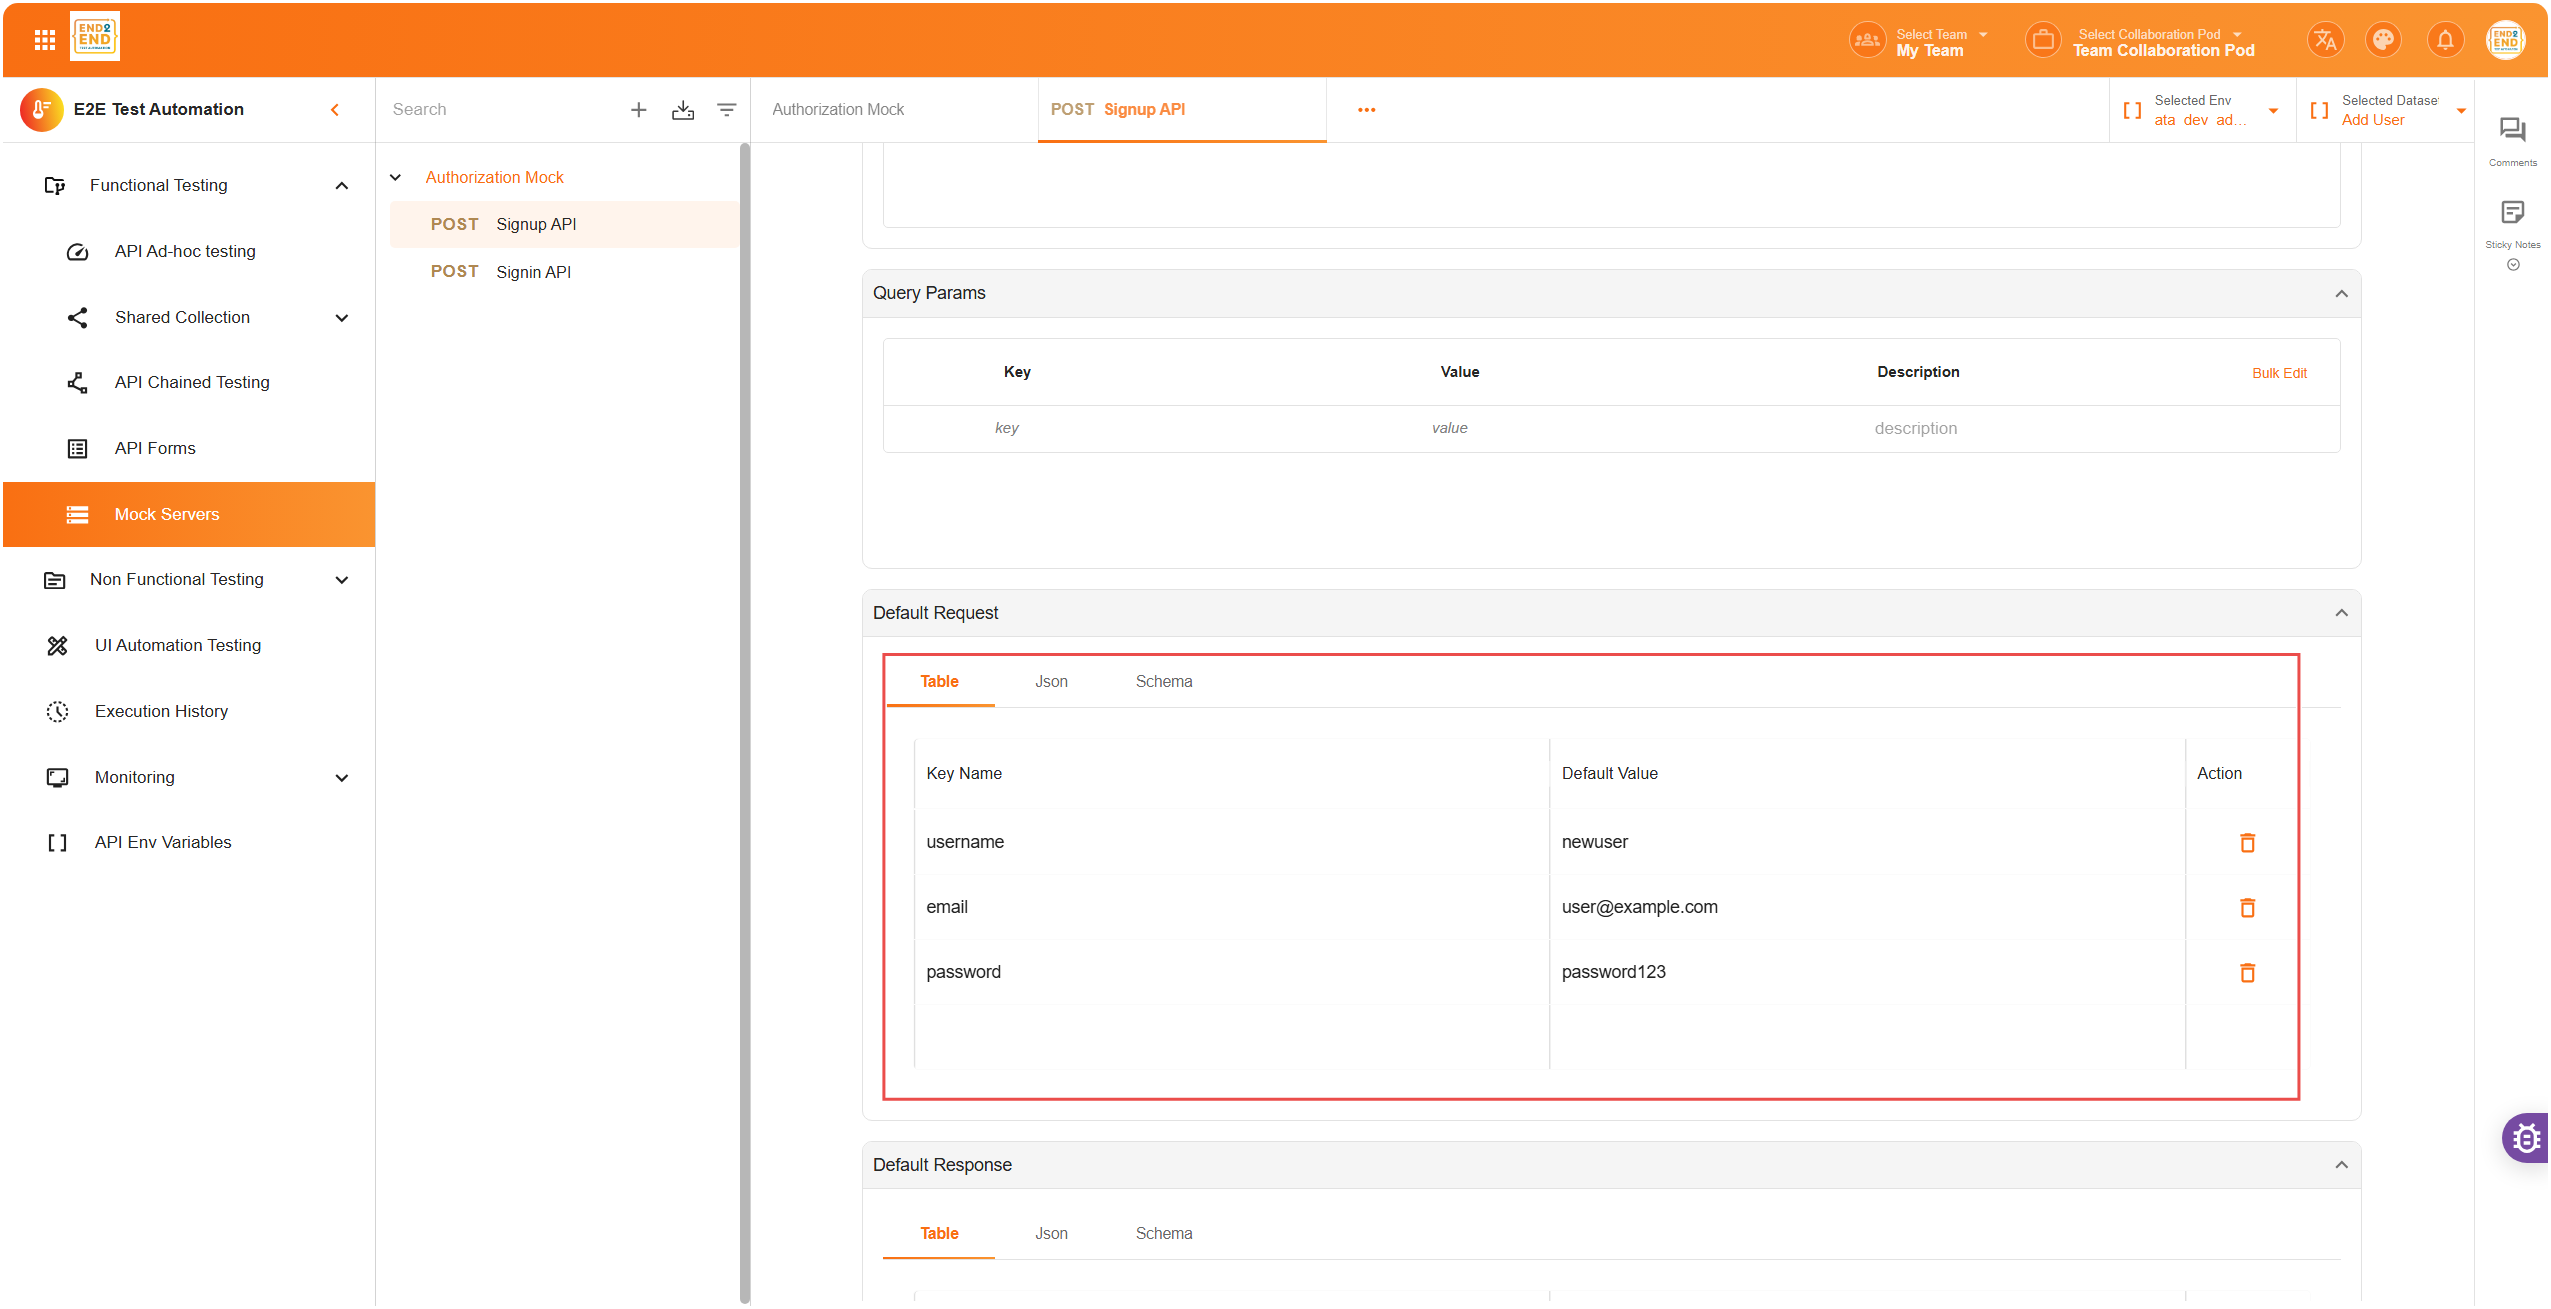
- JSON View – Ideal for developers who prefer writing raw JSON
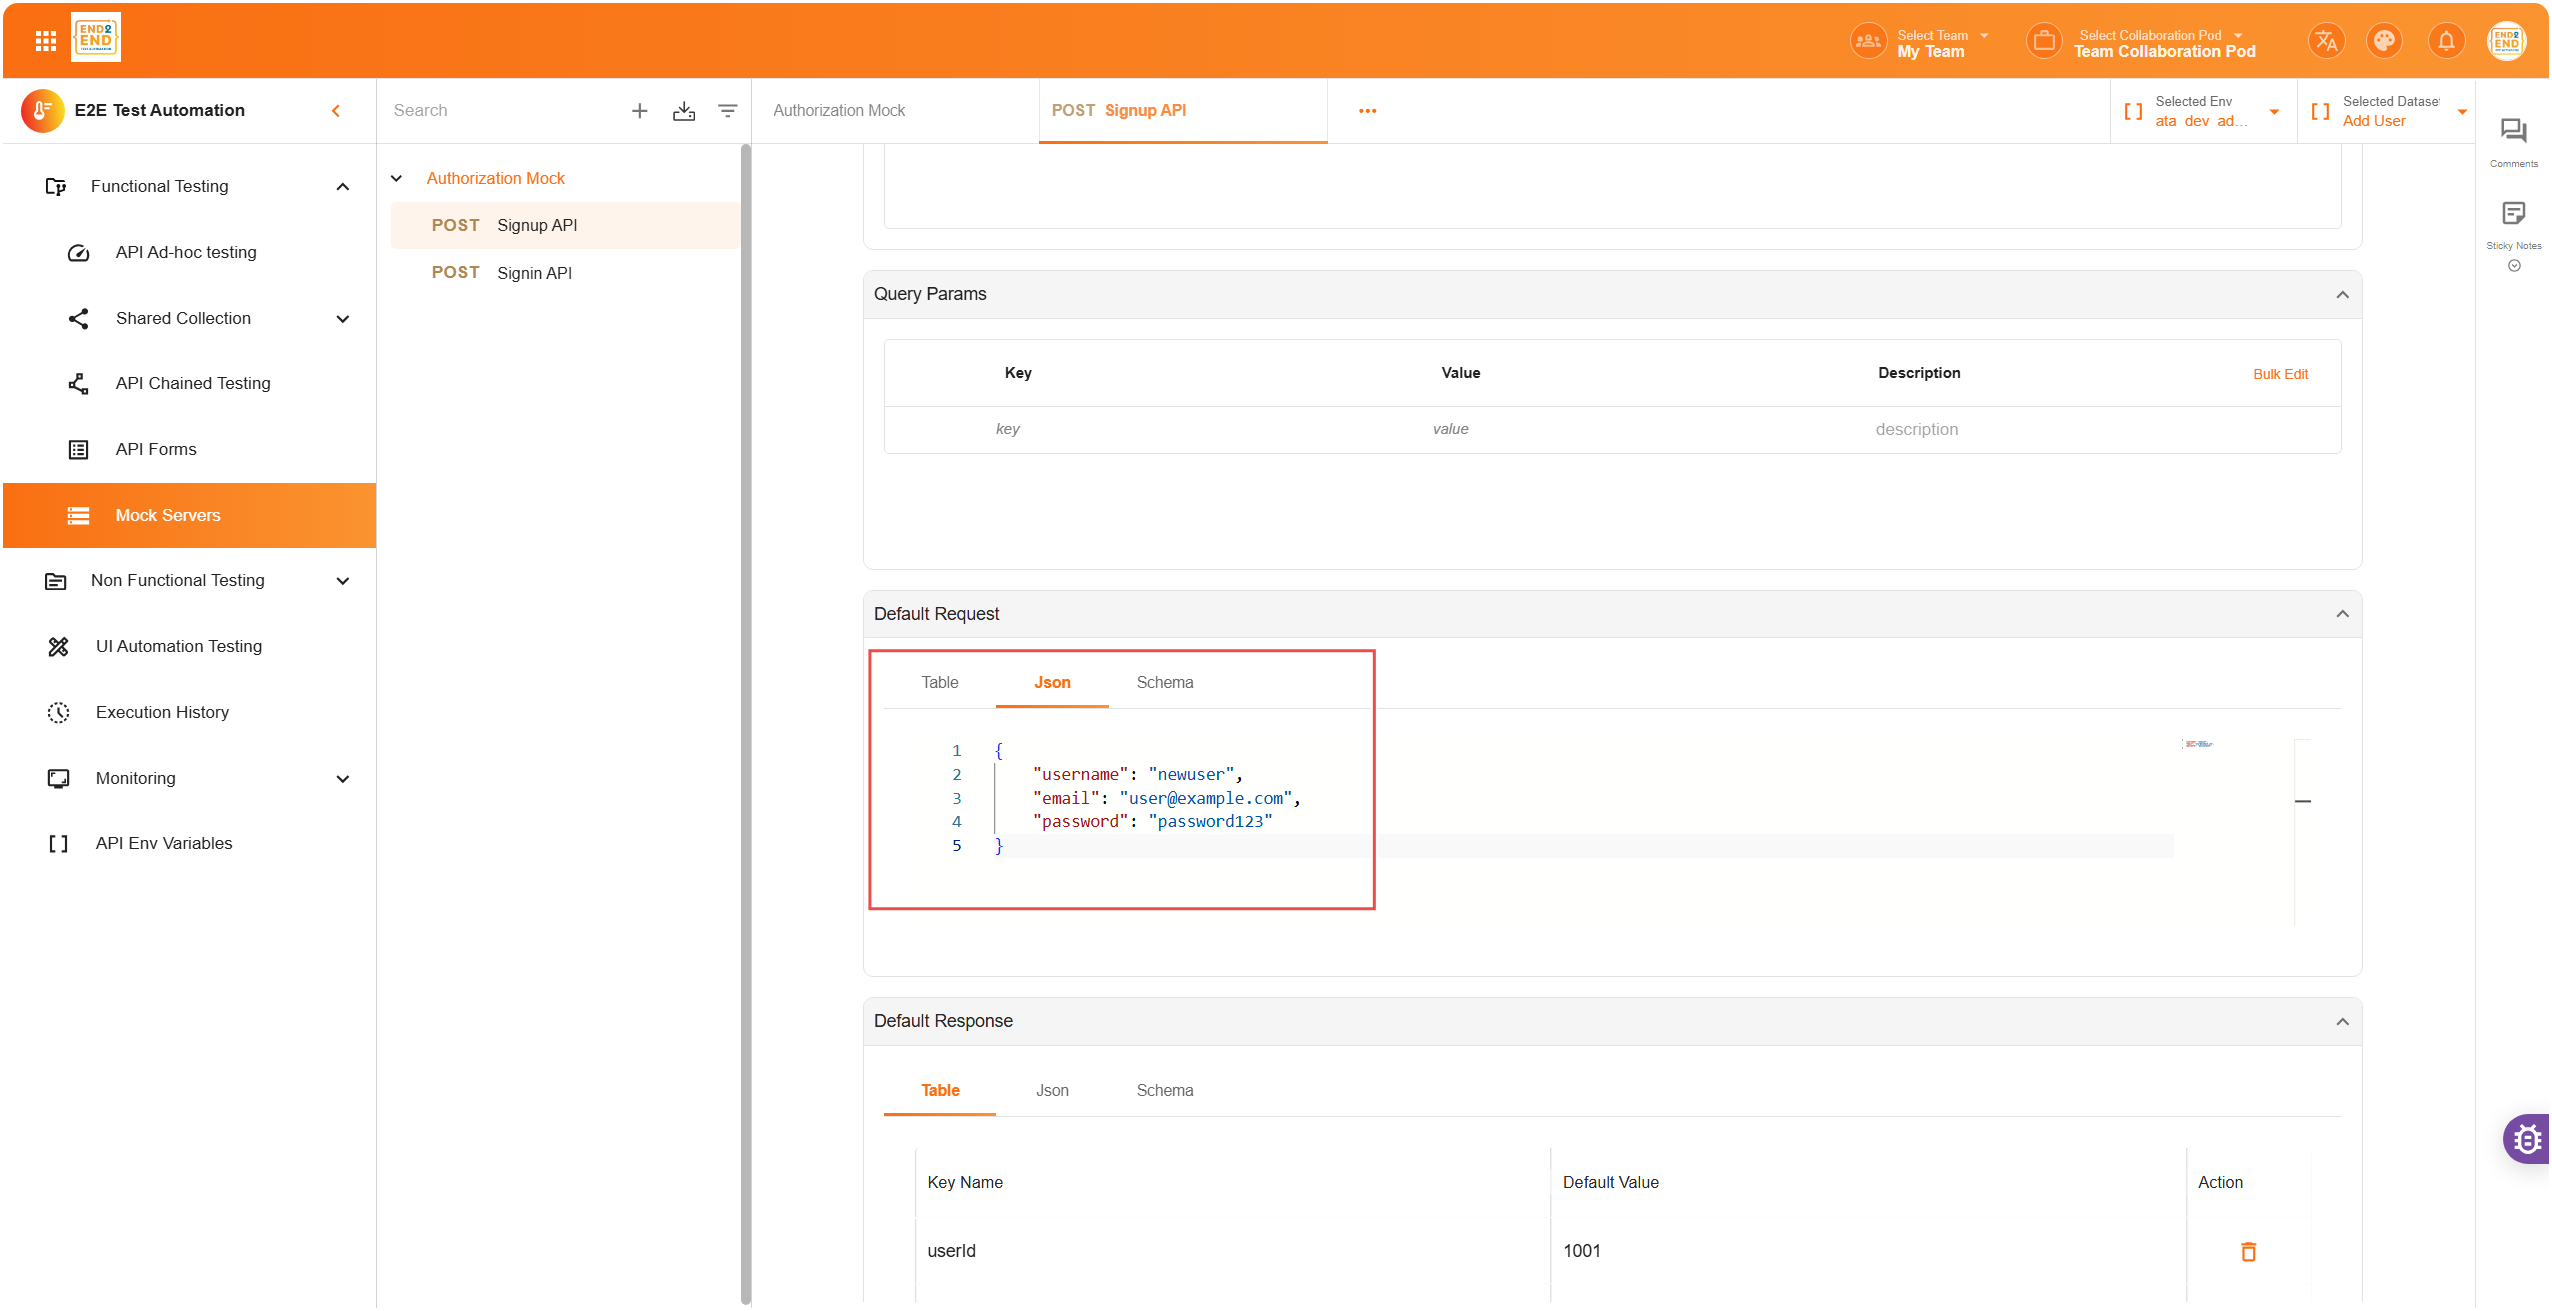
- Schema View – For users working with formal schemas (like OpenAPI or JSON Schema)
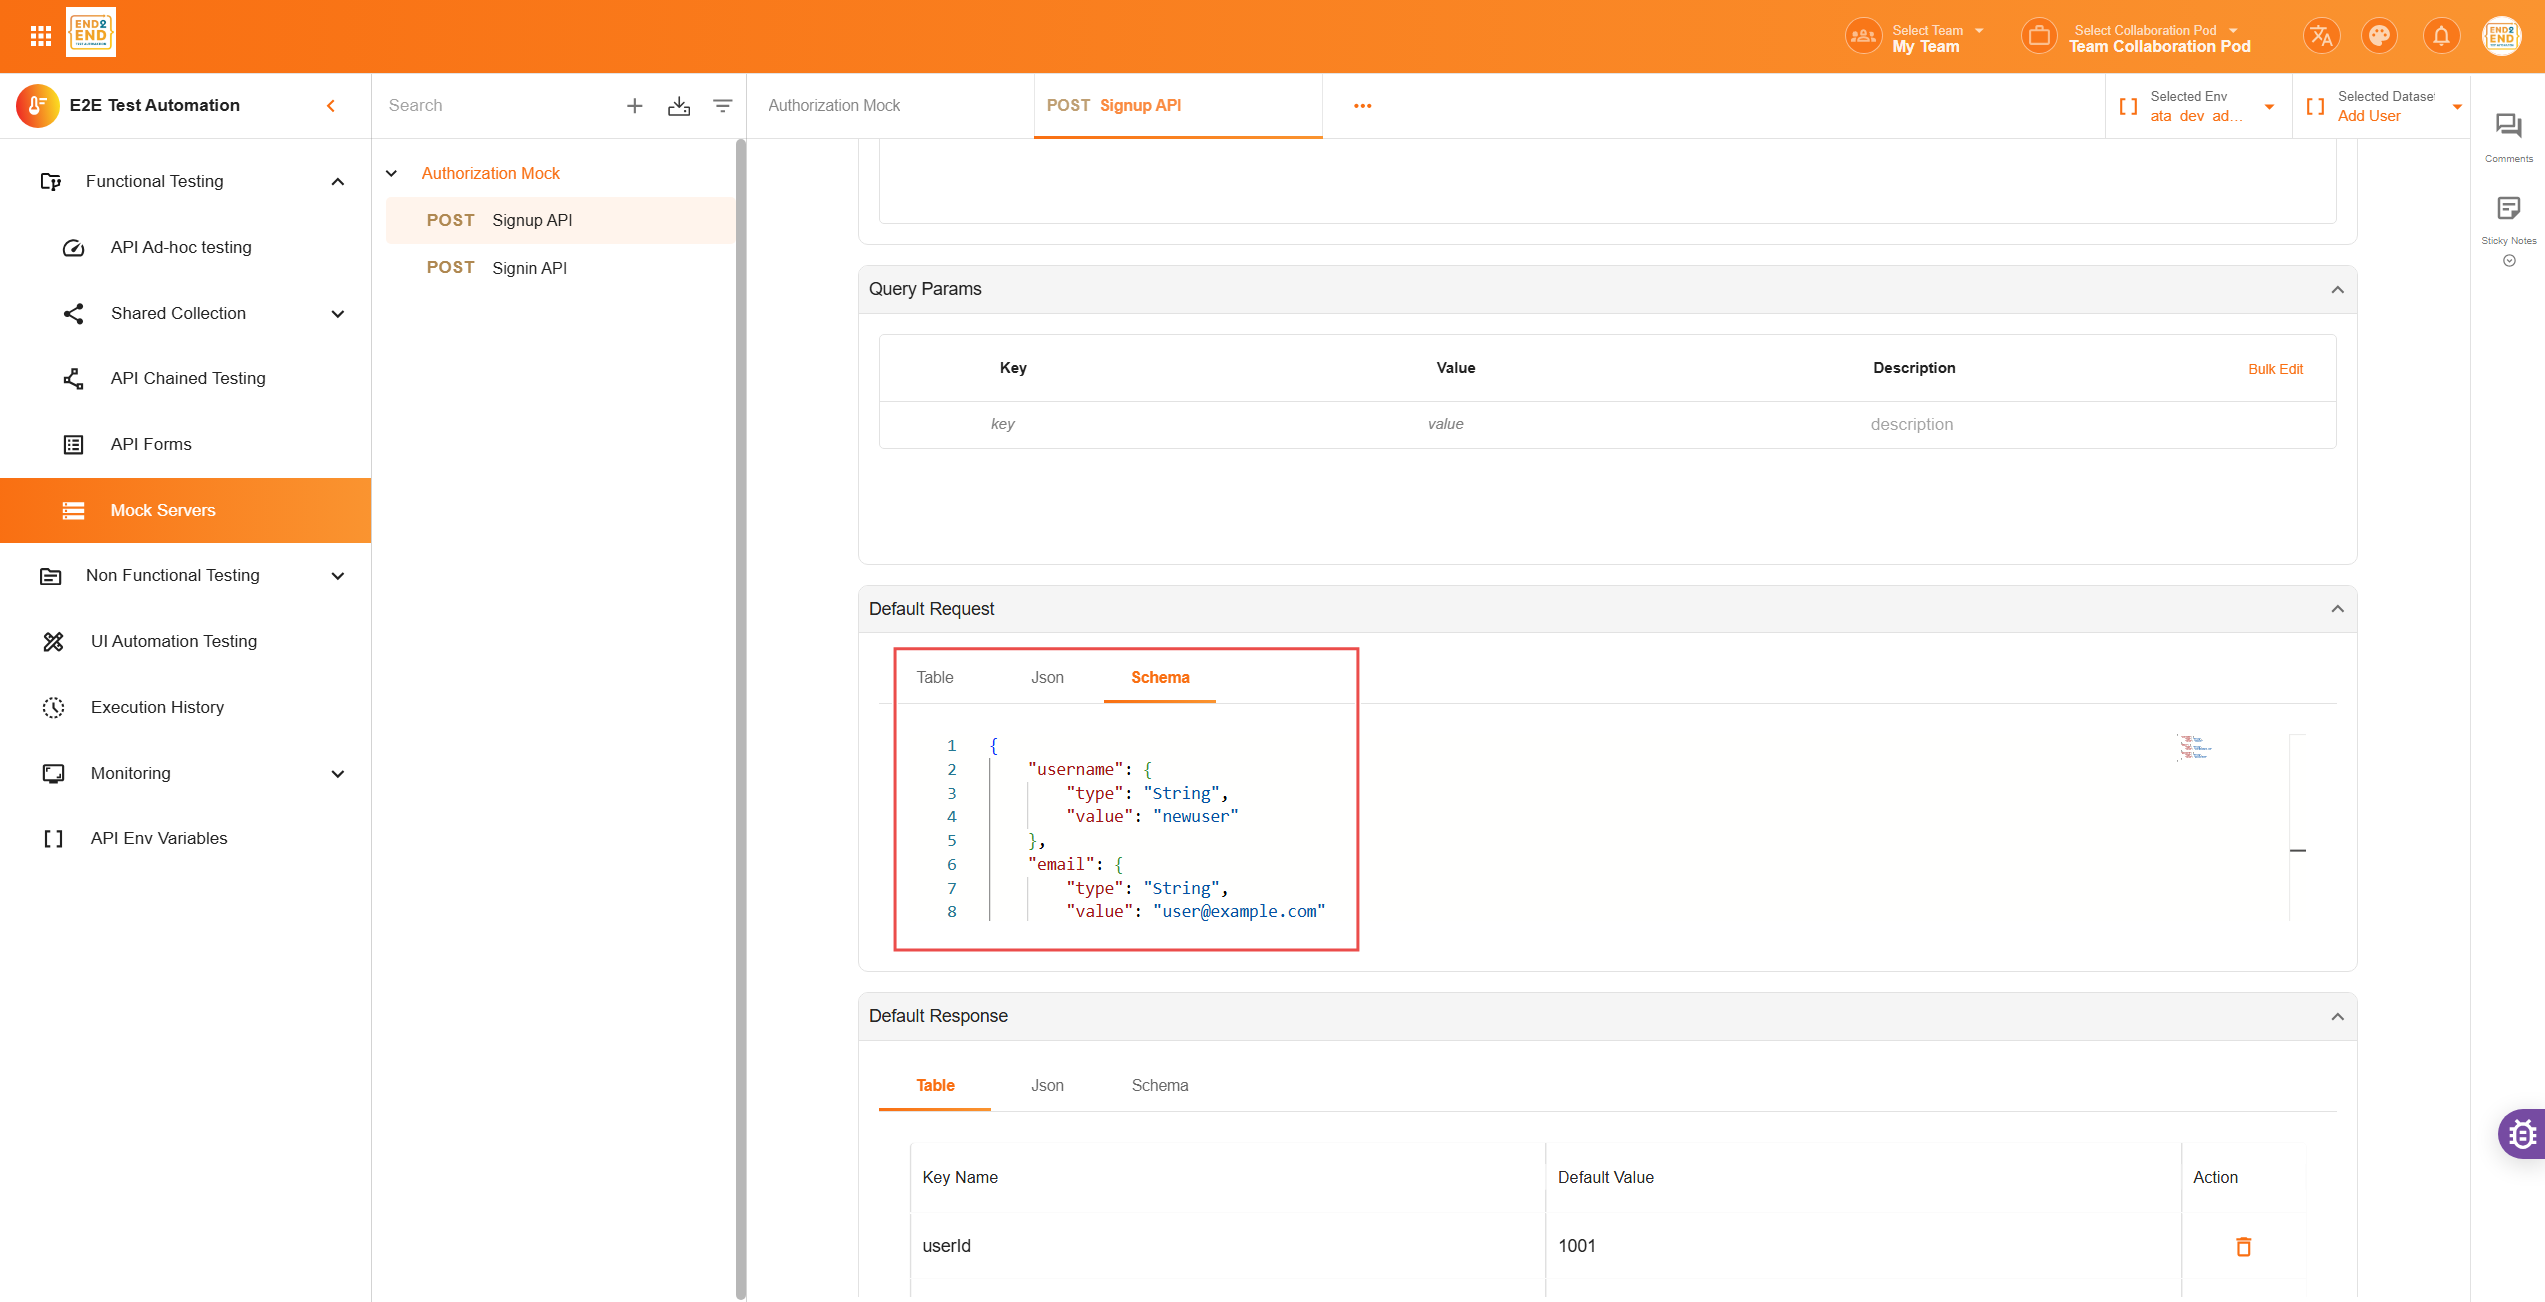
Choose the view that works best for you and define the structure of your incoming request.
Define the Response Body
Now, you can configure the response body, which is what the mock server will return when the endpoint is hit.
Like the request body, you have three view options: Table View, JSON View, and Schema View.
Response Examples:
Successful response (200 OK):
{
  "message": "Login successful",
  "token": "abc123xyz"
}
Error response (404 Not Found):
{
  "error": "User not found"
}
The mock server will return this content when the endpoint is triggered.
📝 Final Notes
Once the mock request is saved:
- It becomes live and can be accessed using the base mock server URL plus your defined endpoint path
- You can return to the mock server page anytime to edit, delete, or duplicate any request
✅ Summary
Mock servers in E2E Test Automation allow you to simulate API requests and responses, providing a testing environment without needing to write backend code. Whether you’re simulating successful responses, error cases, or multiple request scenarios, E2E Test Automation’s mock servers make API testing faster and more flexible.
Happy testing! 🚀